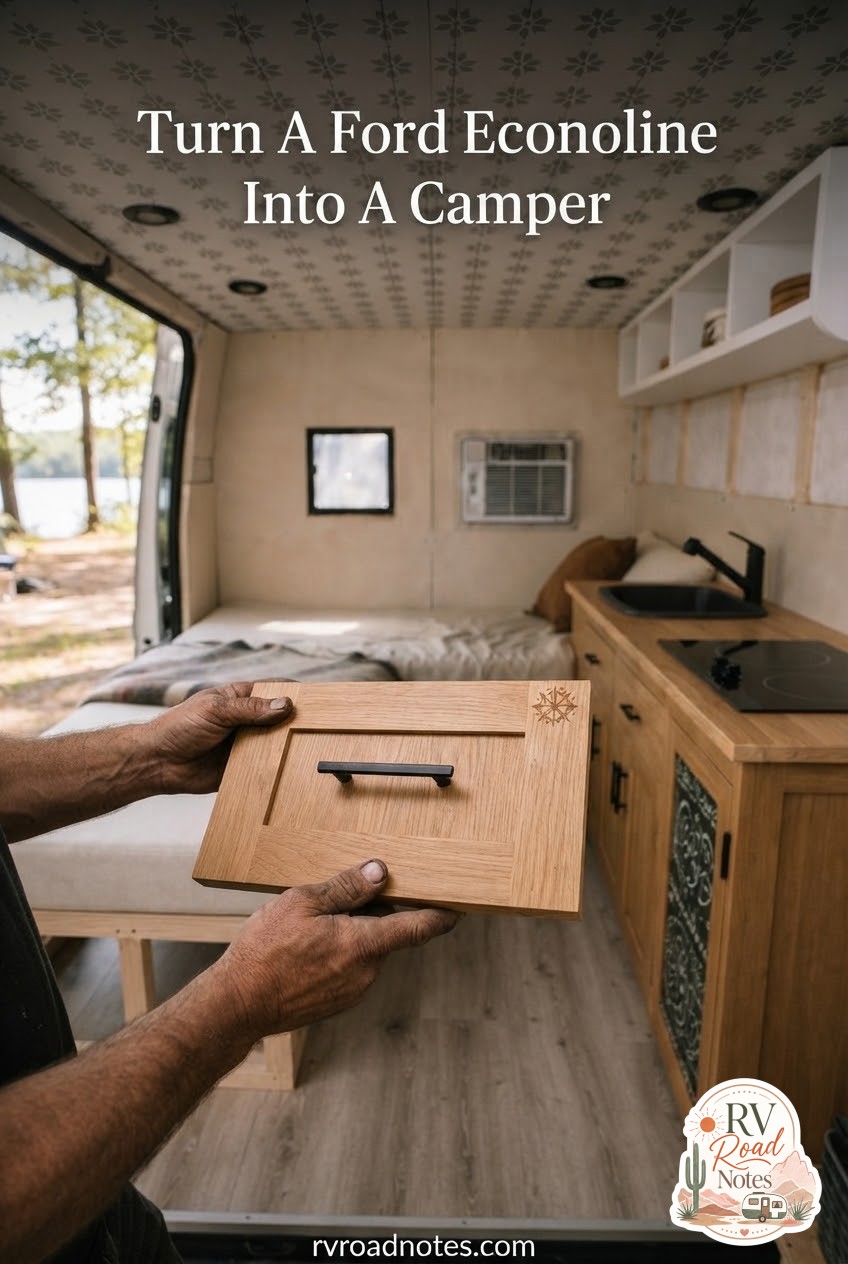
A cargo van doesn't become a camper because you want it to — it becomes one because you measured it, framed it, wired it, and then didn't skip the boring parts. This Ford Econoline conversion went from bare sheet metal to a finished bed and galley in nine stages, and I'm walking through it the way I keep every project on my own rig: with the numbers, the failure points, and where I'd have called a professional. None of this is theoretical — it's the same sequence I'd run on my own Class C if I were ever gutting it back to the ribs.
Measuring Before You Cut Anything
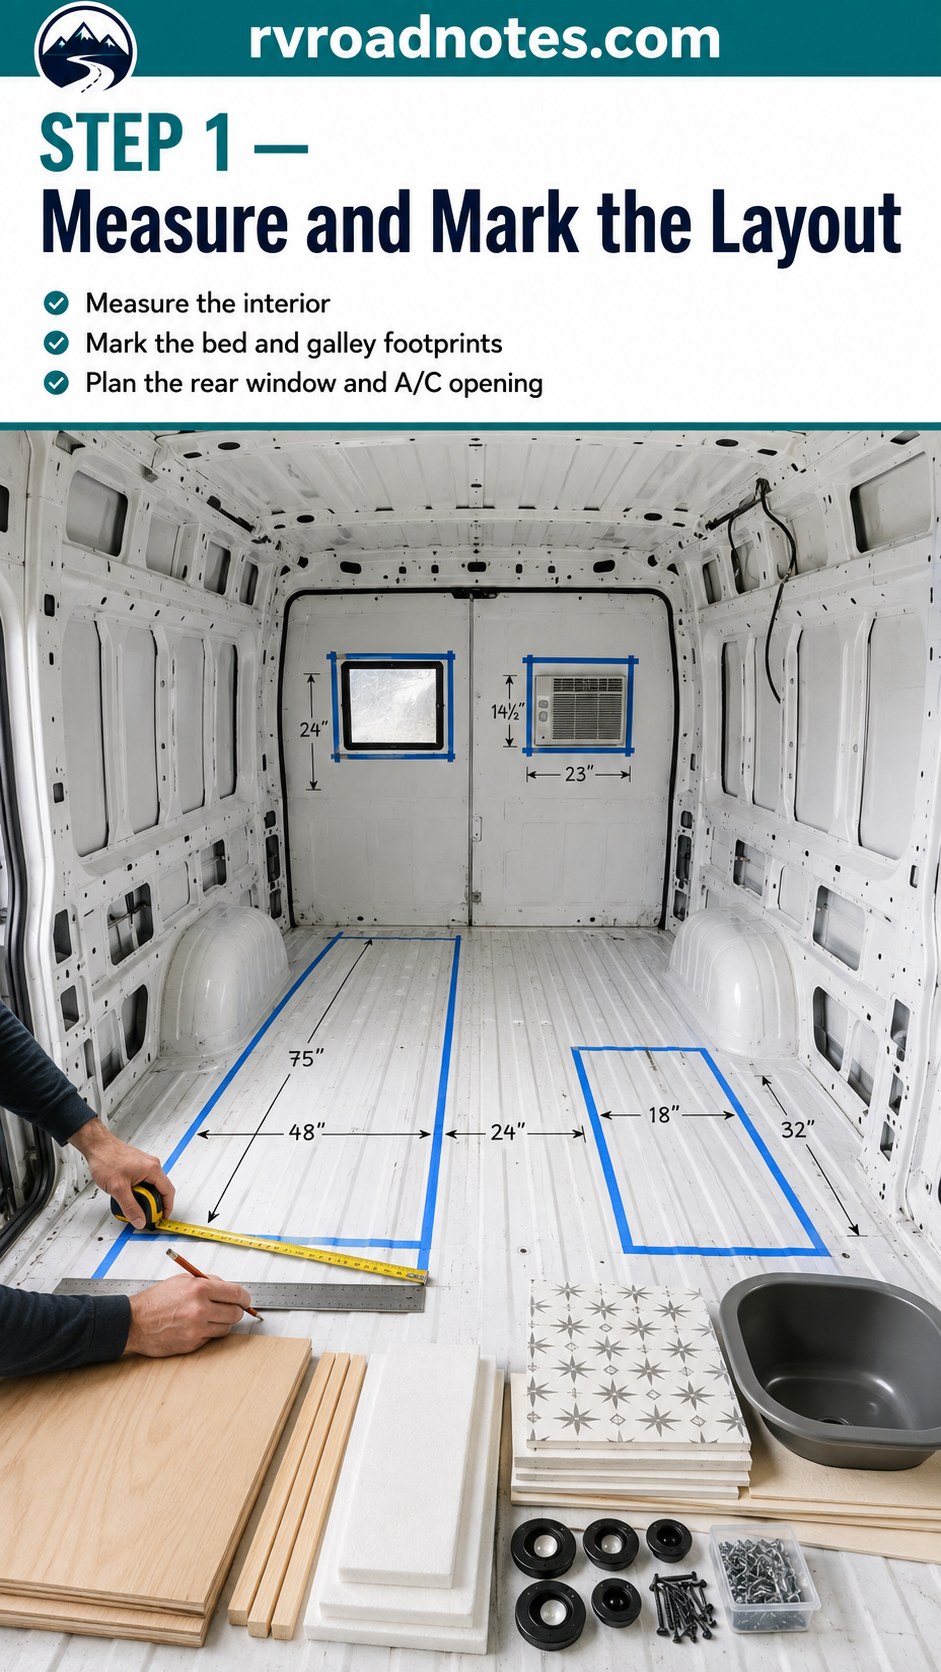
Before I let anyone near this van with a saw, I taped it. Every dimension went on the wall in blue tape before a single cut, because I've learned the hard way — mostly from the subfloor I tore out of my own rig's bathroom — that guessing at layout costs you material twice.
The numbers in this shot aren't decorative: a 75-inch bed run, 48-inch and 24-inch marks boxing in the galley footprint on the right, 18-inch and 32-inch marks for the water and grey tank plumbing, plus a 23-inch window cutout and roughly 14.5-inch marked for the rear A/C opening. I measured the interior twice and wrote it down once, which is the same rule I use for a maintenance log — if it's not written down, it didn't happen.
- Check payload before you buy materials. An Econoline cargo van's GVWR minus its curb weight is your budget for plywood, batteries, water and you — weigh empty at a CAT scale before you plan a pound of it.
- Mark bed, galley, window and A/C footprints before insulation goes in, because you cannot see the ribs once foam covers them.
Insulated Subfloor: Foam First, Then Plywood
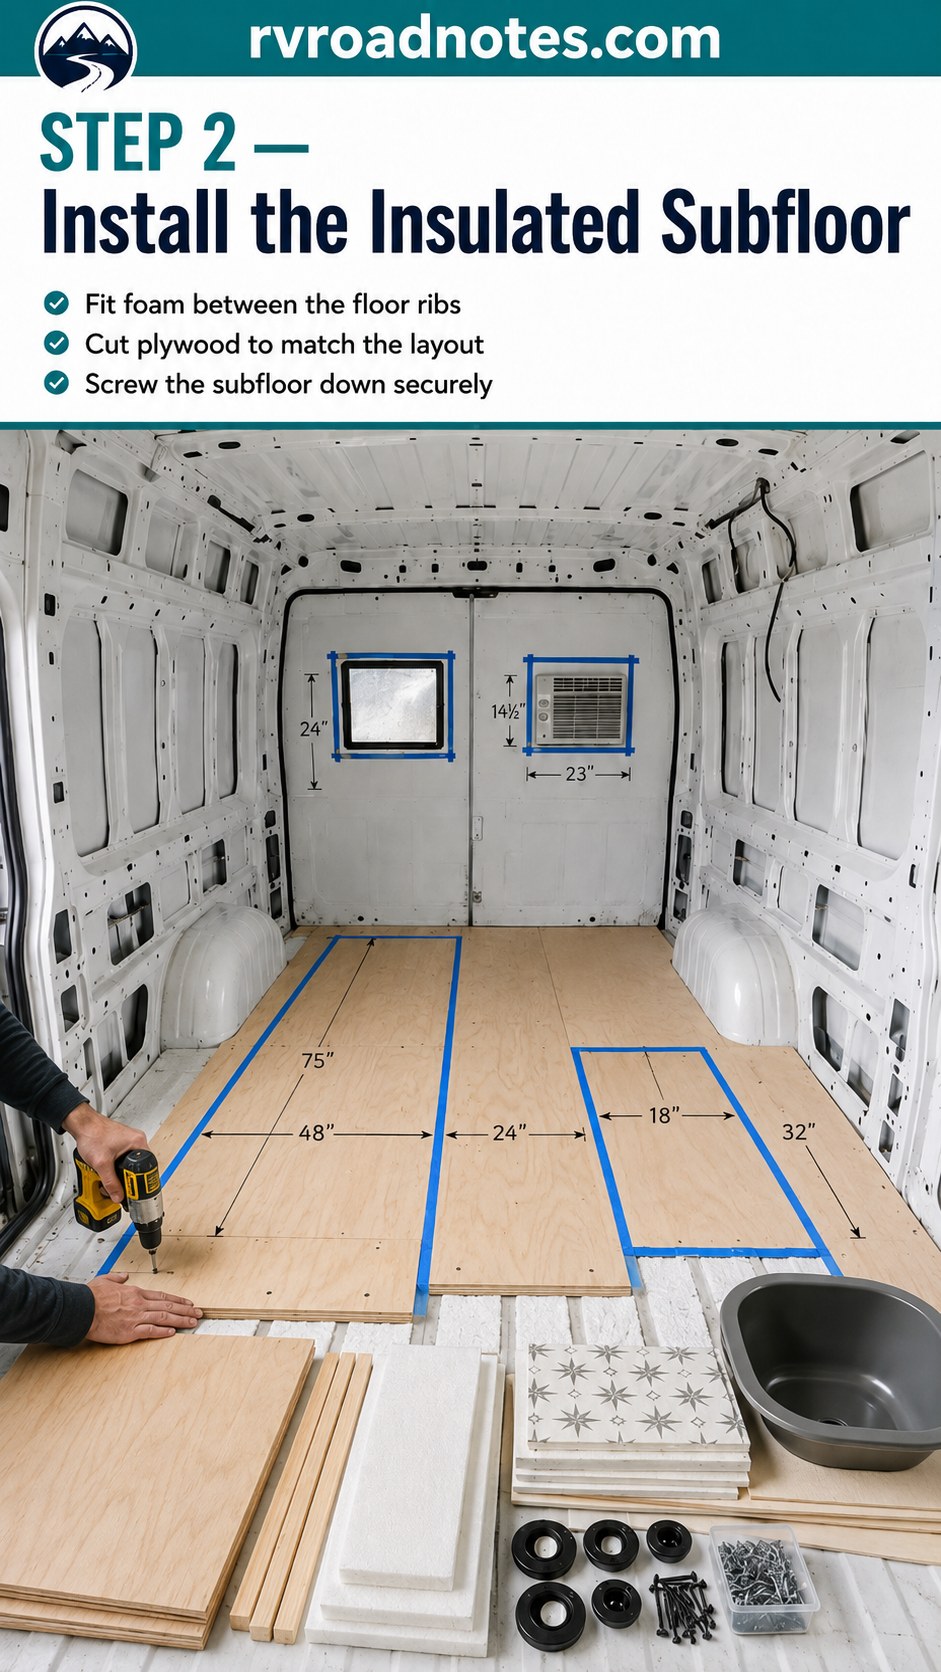
Insulated subfloor next, and this is the step people skip or half-do. Rigid foam gets cut to fit between the steel floor ribs — not squished, not gapped — then 3/4-inch plywood goes down over the top and gets screwed, not just adhered, into the ribs below.
I rebuilt a bathroom subfloor on my own rig two winters ago after a slow leak sat under vinyl longer than I want to admit, so I'm blunt about this: a gap in the foam is a cold spot, and a cold spot is where condensation happens under the floor, unseen, until the plywood goes soft. Take the extra hour to trim the foam tight.
The subfloor is the one layer you'll never inspect again once flooring goes down — get it right or live with it for the life of the van.
Screw pattern matters too: every 12 inches into a rib, not just around the perimeter, or you'll get flex underfoot within a season of washboard roads.
Furring Strips: The Skeleton for Panels
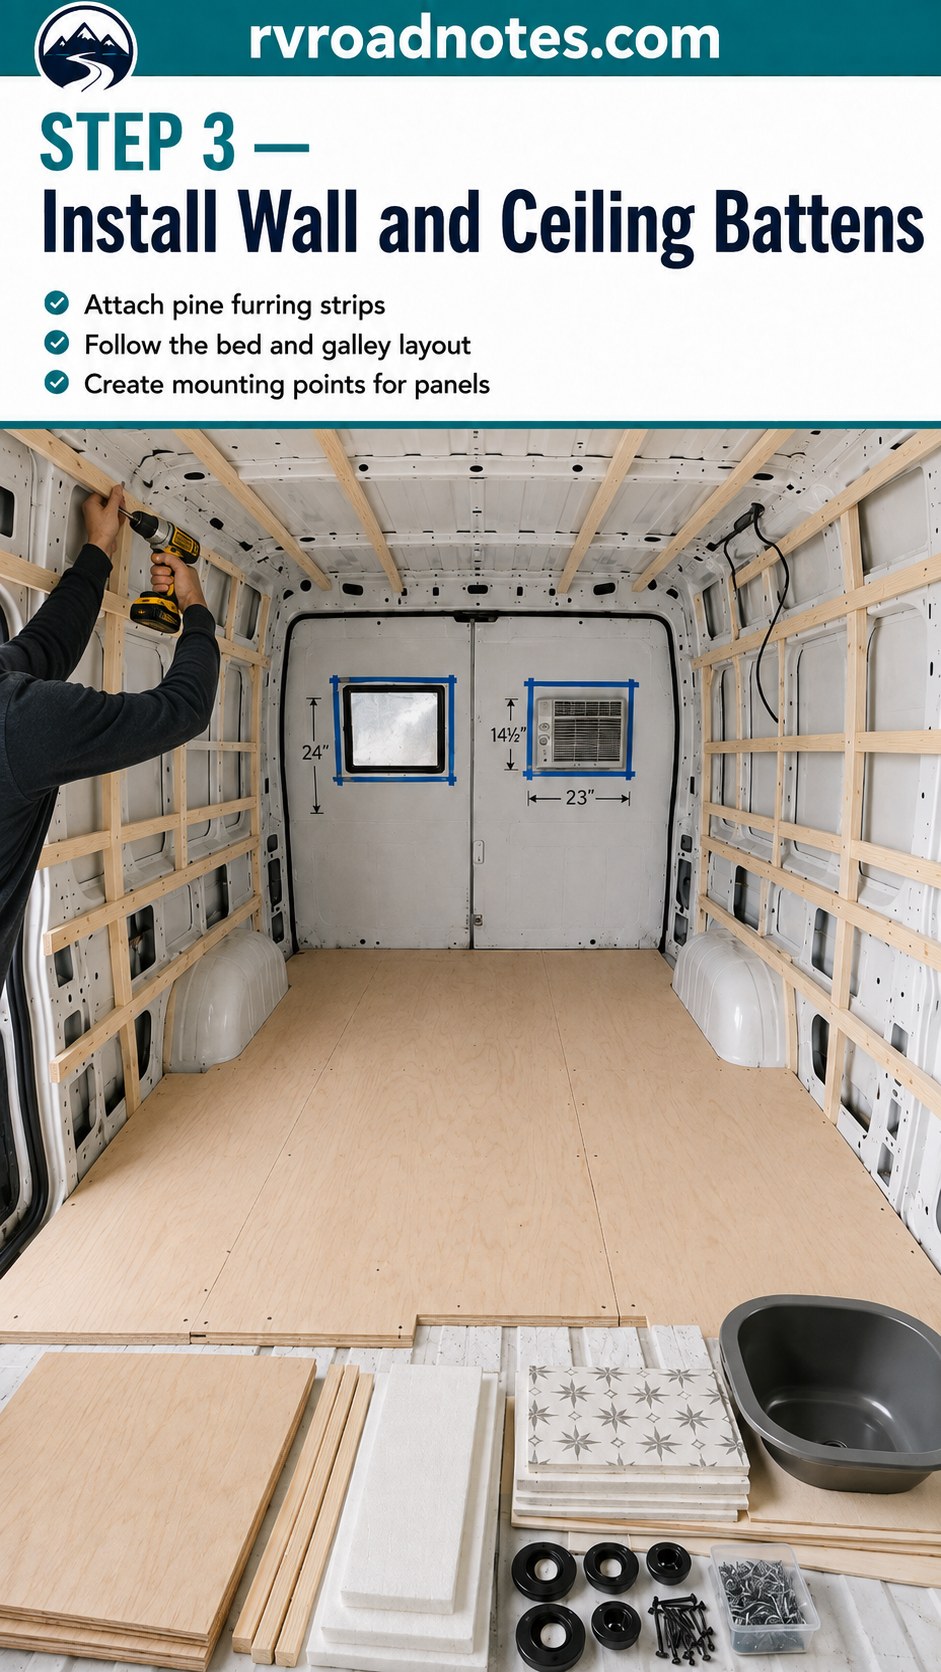
Walls and ceiling get pine furring strips before anything else goes up — the battens running vertically and horizontally in this shot are what every panel, cabinet screw and light fixture will eventually anchor into. Sheet metal alone won't carry a cabinet's weight over 60,000 miles of interstate expansion joints.
I laid mine out to match the bed and galley footprint marked in step one, so the battens land exactly where the bed platform and galley cabinets need mounting points later — there's no fixing a batten that's six inches off once insulation and panels are up.
- Space furring strips to match panel width and future cabinet mounting points, not just evenly.
- Leave the wheel wells and rear doors accessible — you'll want that access again during wiring and A/C install.
Wiring Before You Bury It in Foam
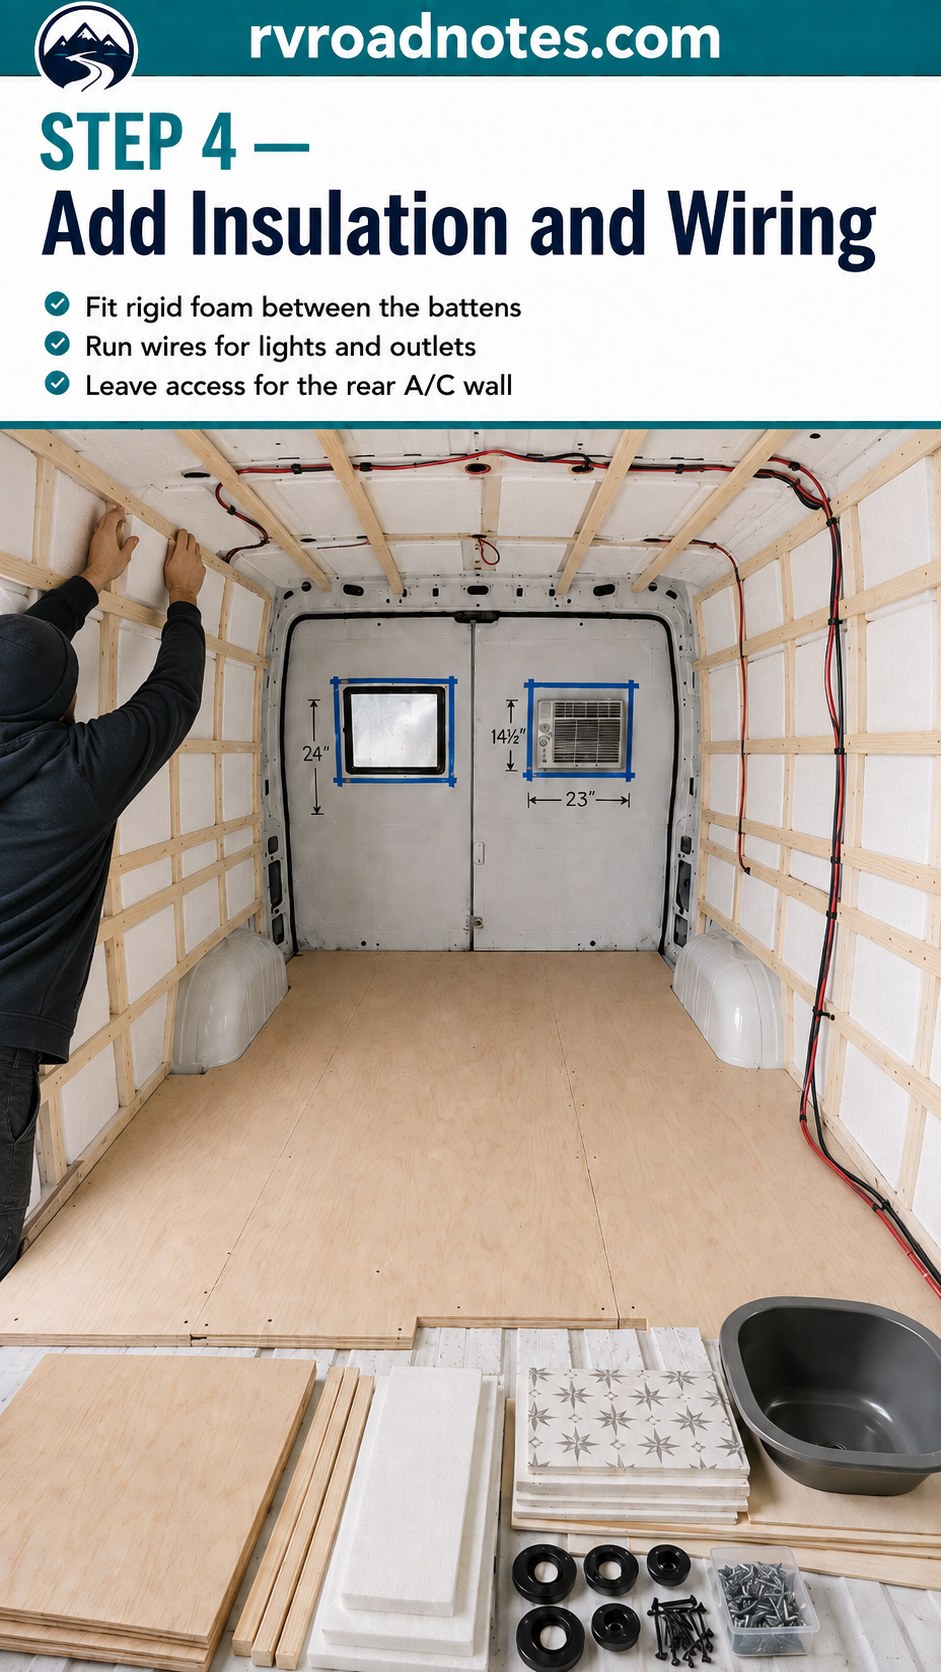
Rigid foam goes between the battens next, and this is the step where wiring has to happen at the same time — not before, not after. Every wire for lights and outlets gets run and secured now, while the studs are still open, because fishing a wire through finished paneling later means cutting into work you already did.
I ran mine along the ceiling battens and down the rear wall, leaving a deliberate gap of open wiring near the back for the A/C circuit — you can see it hanging loose in this shot, not yet terminated, because the window unit and its dedicated outlet weren't going in until the panel behind them was cut.
A word on the electrical here: a 120V circuit for a window A/C is not a place to freelance if you're not confident reading a wiring diagram. I do my own 12V work without much hesitation; anything on the 120V side I'm unsure about, or anything involving propane, goes to a licensed electrician or RV tech. And whatever heat or cooking appliance eventually goes into this galley, a working carbon monoxide detector is non-negotiable from day one, tested monthly, not after move-in.
Paneling the Rear Wall and Setting the Window A/C
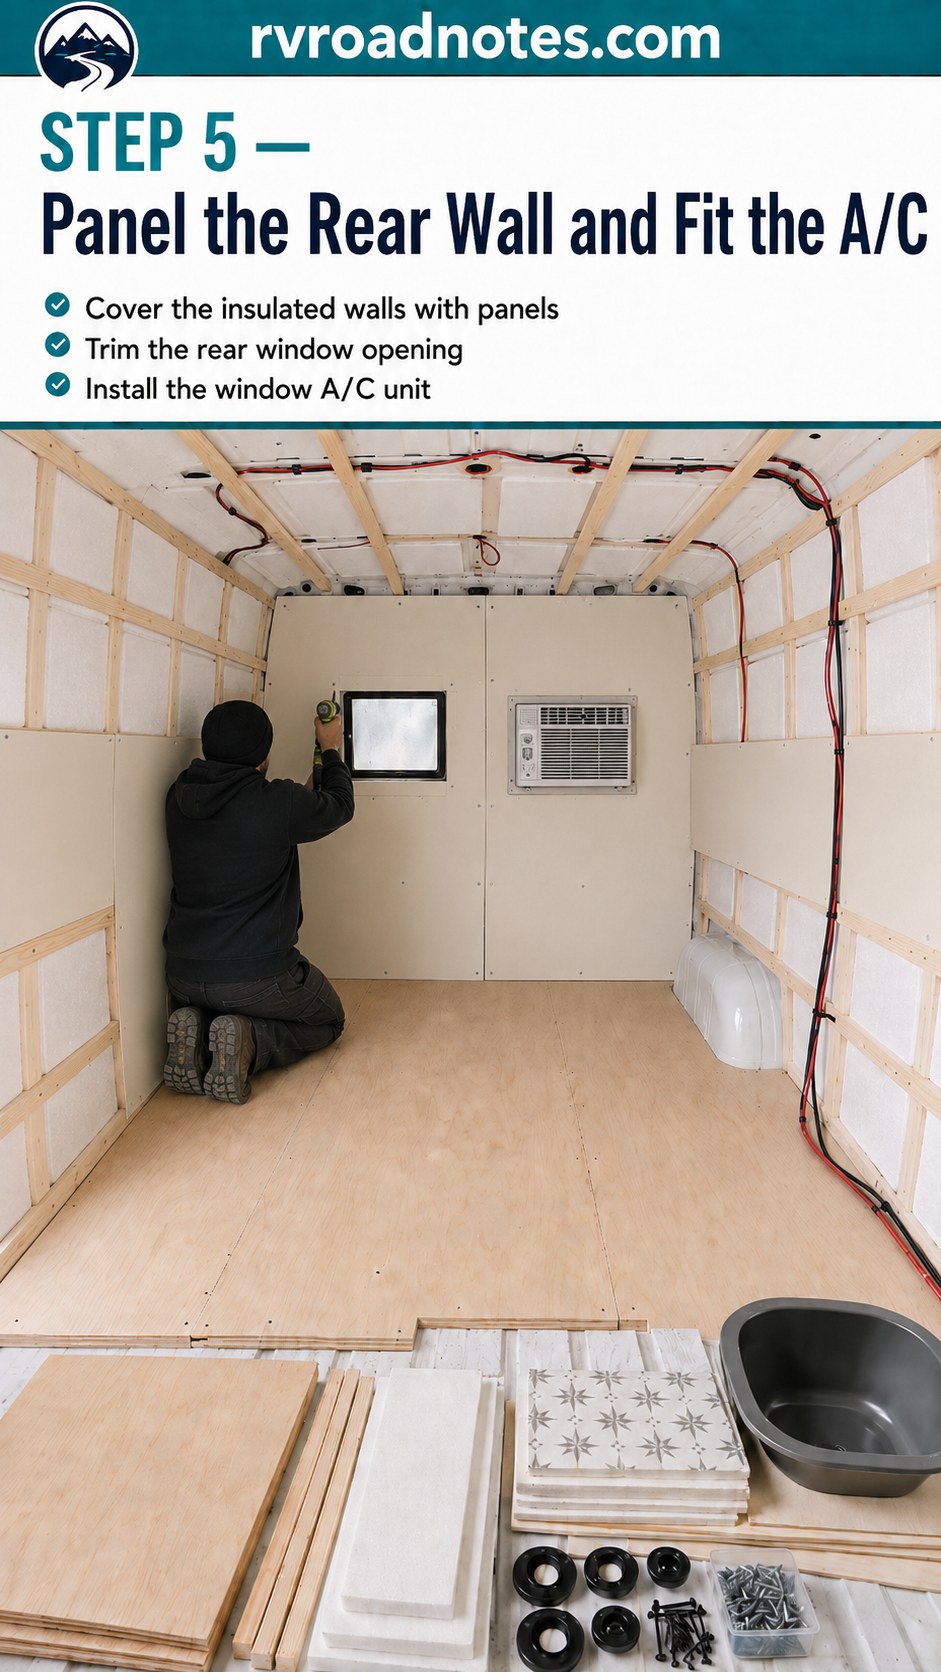
Paneling the rear wall is oddly satisfying after three steps of bare studs and foam — it's the first moment the van starts reading as a room instead of a shell. The window opening gets trimmed to the exact 23-inch mark from the layout step, and the window A/C unit drops into that rear wall opening rather than the roof, which changes the whole ceiling plan.
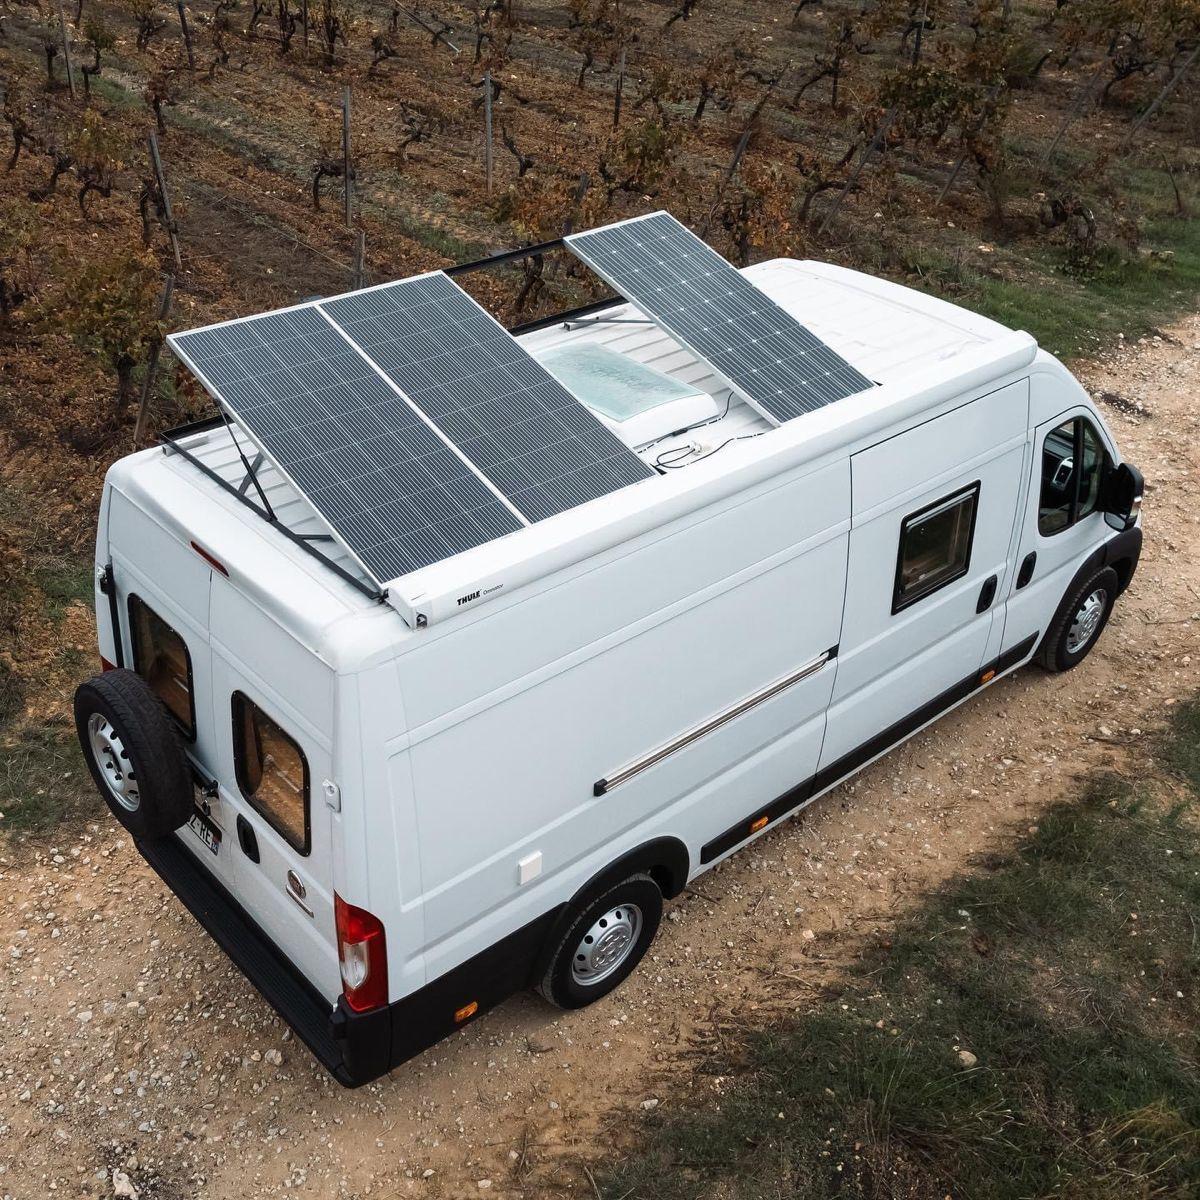
A rear window A/C keeps the roof clear for solar later — something I'd have valued on my own rig before I ever added panels up there — but it also needs solid framing on both sides to carry its weight, which is why the battens from step three had to land exactly where they did.
- Window A/C runs on 120V only — shore power or a generator, never straight off a house battery bank unless you've sized an inverter for the startup draw.
- Never run a generator near an intake, window or under the rig — carbon monoxide doesn't announce itself.
Ceiling Panels and Puck Lights
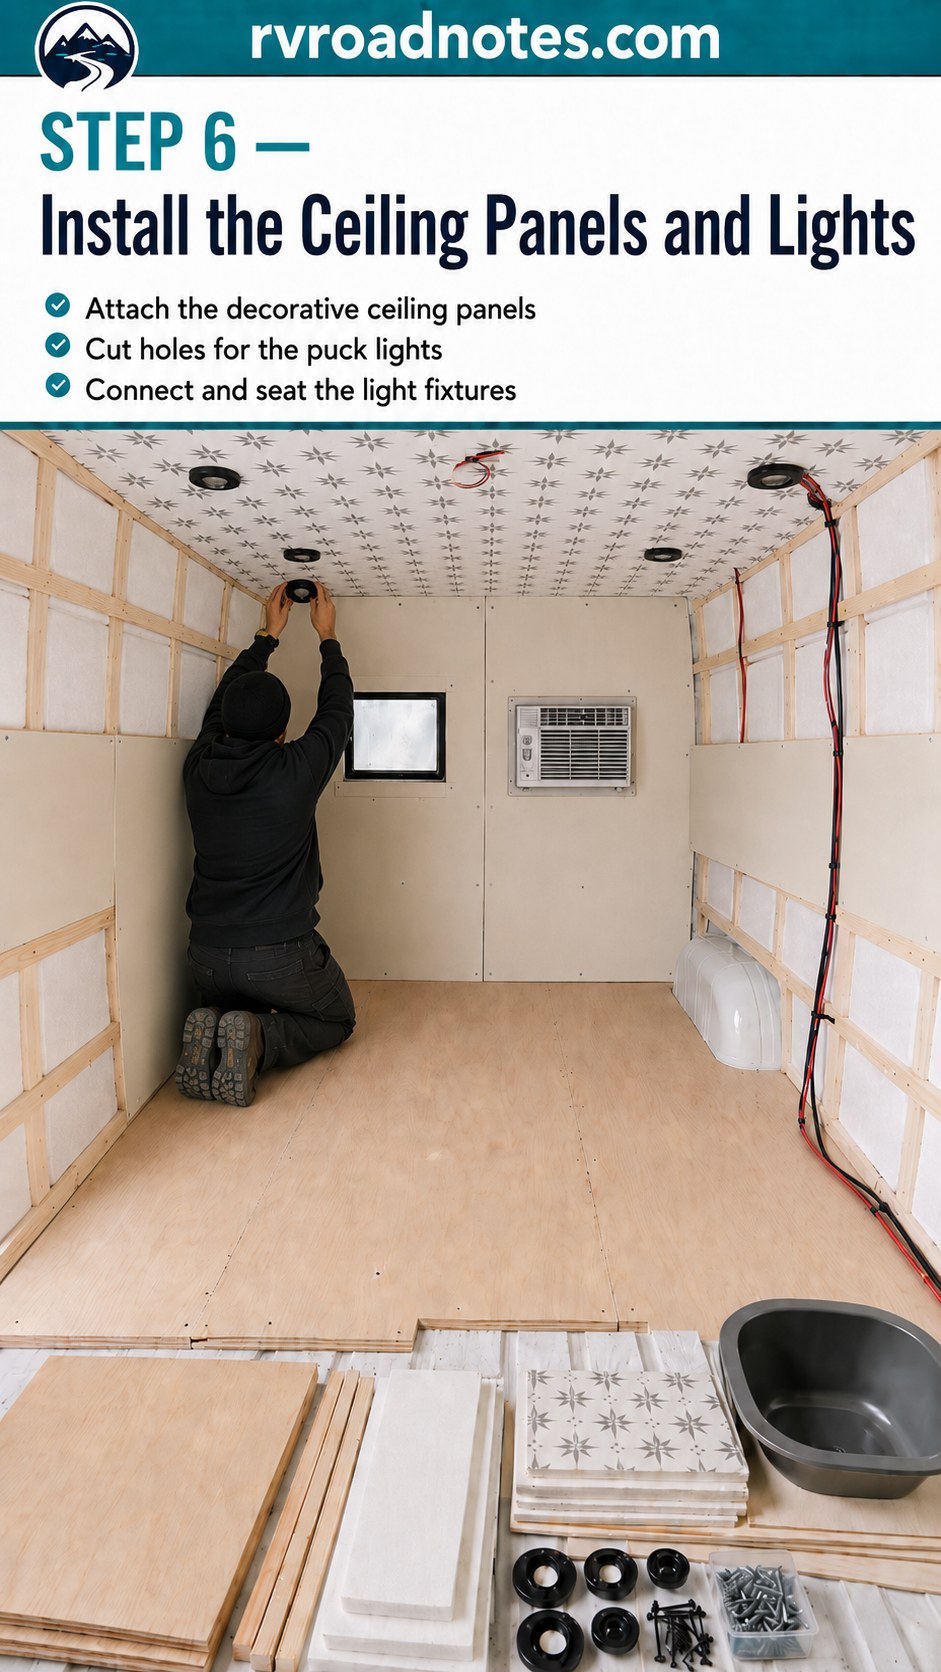
Ceiling panels go up next, and this build uses a patterned decorative panel rather than plain plywood — the small tile-like print already covers half the ceiling in this shot, with the driver's side still bare foam waiting its turn. It's a nice-looking choice, but it also needs precise cutouts for the puck lights before it goes up, not after.
I mark every light location on the panel from the back before installing it, drill the pilot hole first, then cut the full hole from the front to avoid splintering — a lesson I only needed to learn once, on my own rig's dinette rebuild, where I cut from the wrong side and had to patch it.
Puck light checklist
- Confirm wire runs from the previous step reach every marked light location before the panel goes up
- Seat each fixture and test it before moving to the next panel section
- Leave a service loop of wire at each fixture in case a puck light fails down the road
Framing the Bed Platform
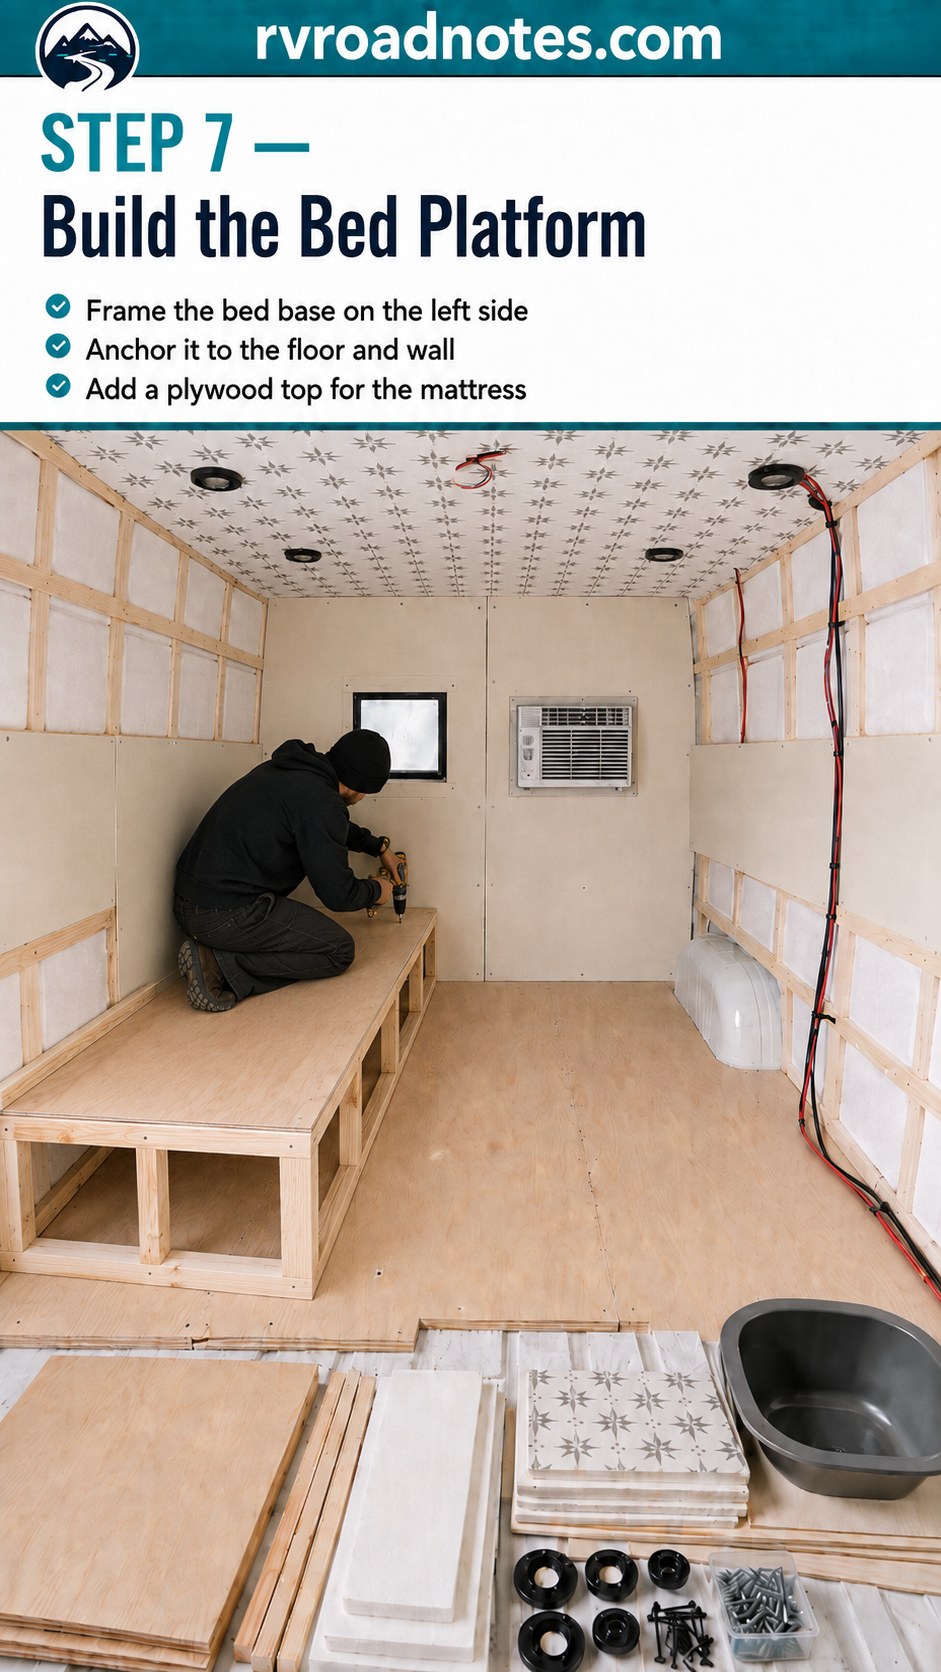
The bed platform frames up on the left side, anchored into both the floor and the wall battens — not just resting there, not just screwed to the subfloor, but tied into the wall studs too, because a bed platform that isn't wall-anchored will rack and loosen with every mile of washboard road.
Plywood tops the frame for the mattress base, and the open cubbies framed into the front of the platform are exactly the kind of dead space I'd have killed for before I rebuilt my own dinette — storage under a fixed bed is nearly free square footage if you frame for it from the start rather than boxing it in solid.
If you're building this with a dog in mind, think about platform height now, not later — mine is old enough that a low step-up matters, and a bed frame with no gap for a step is a decision you'll regret by year three.
Building the Galley and Overhead Storage
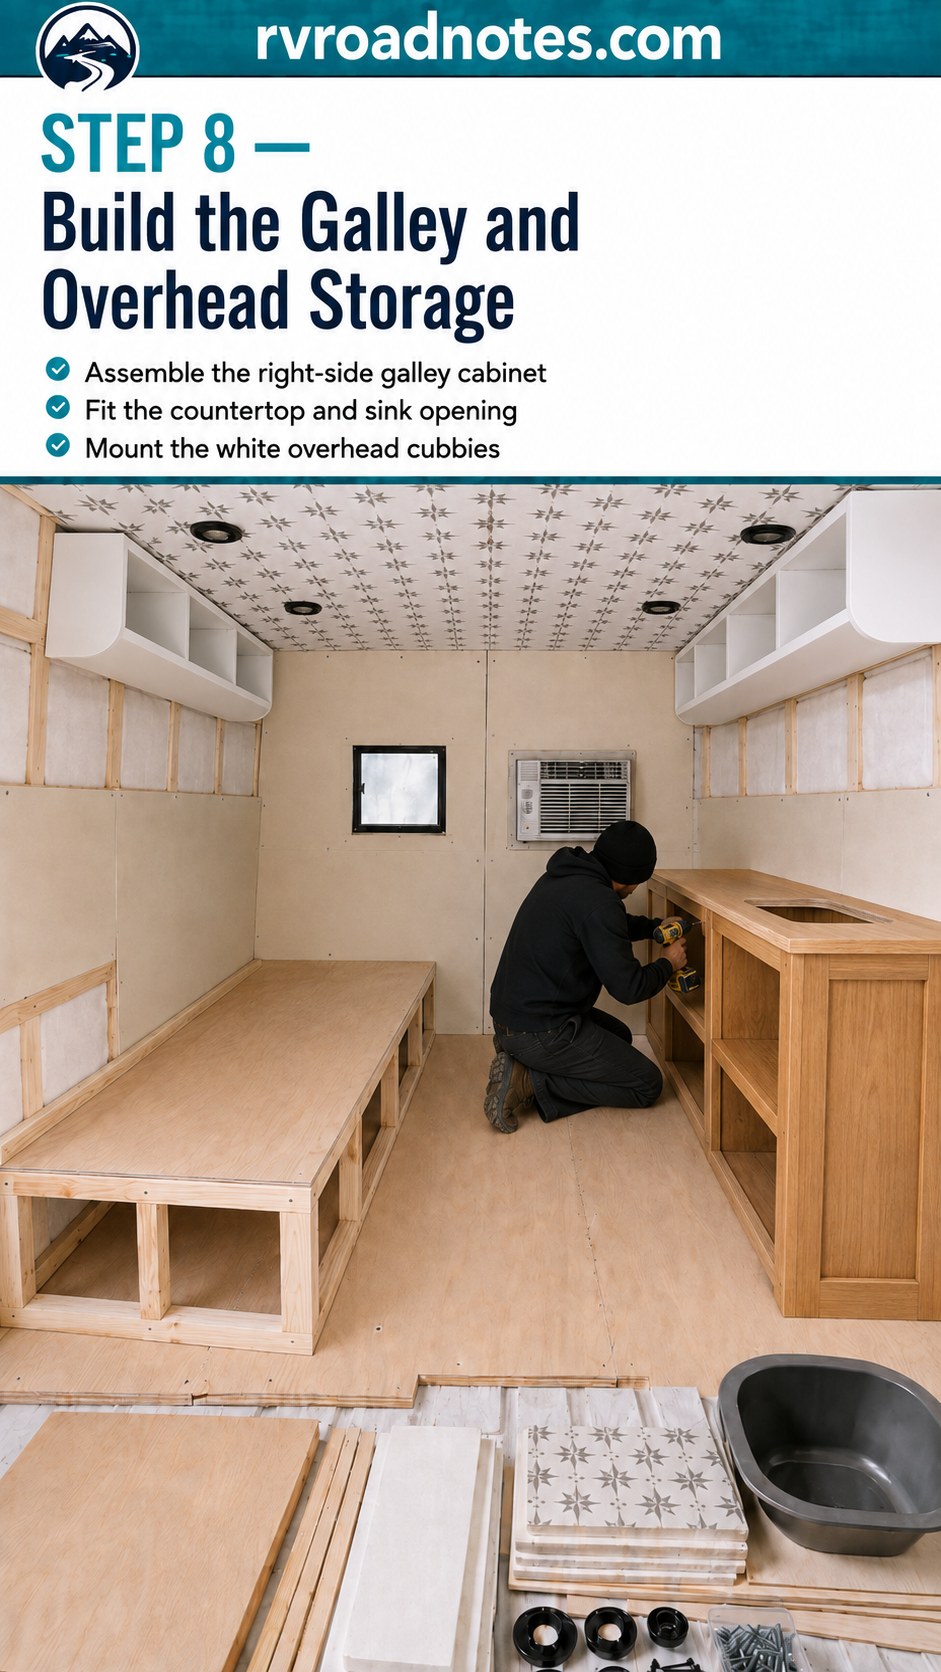
The galley goes in on the right side, mirroring the bed across the aisle, and this is where the build starts eating your weekend — the cabinet carcass, the countertop with its sink cutout already routed, and the white overhead cubbies mounted above all have to be built and hung while you can still get a full drill swing in the space.
I'd mount the overhead cabinets before the countertop went in permanently if I were doing this over, purely for the working room, but this build sequences them close together and it works fine as long as you check the cabinet's weight against what the wall battens can actually hold — a loaded overhead cabinet in a moving vehicle is a real structural load, not a shelf.
- Countertop sink cutout should be cut and test-fit before permanent mounting
- Overhead cubbies need positive mechanical fastening into battens, not just screws into thin paneling
- Weigh the finished galley mentally against your payload number from step one — cabinetry, water and dishes add up fast
Dropping in the Sink and Finishing the Cushions
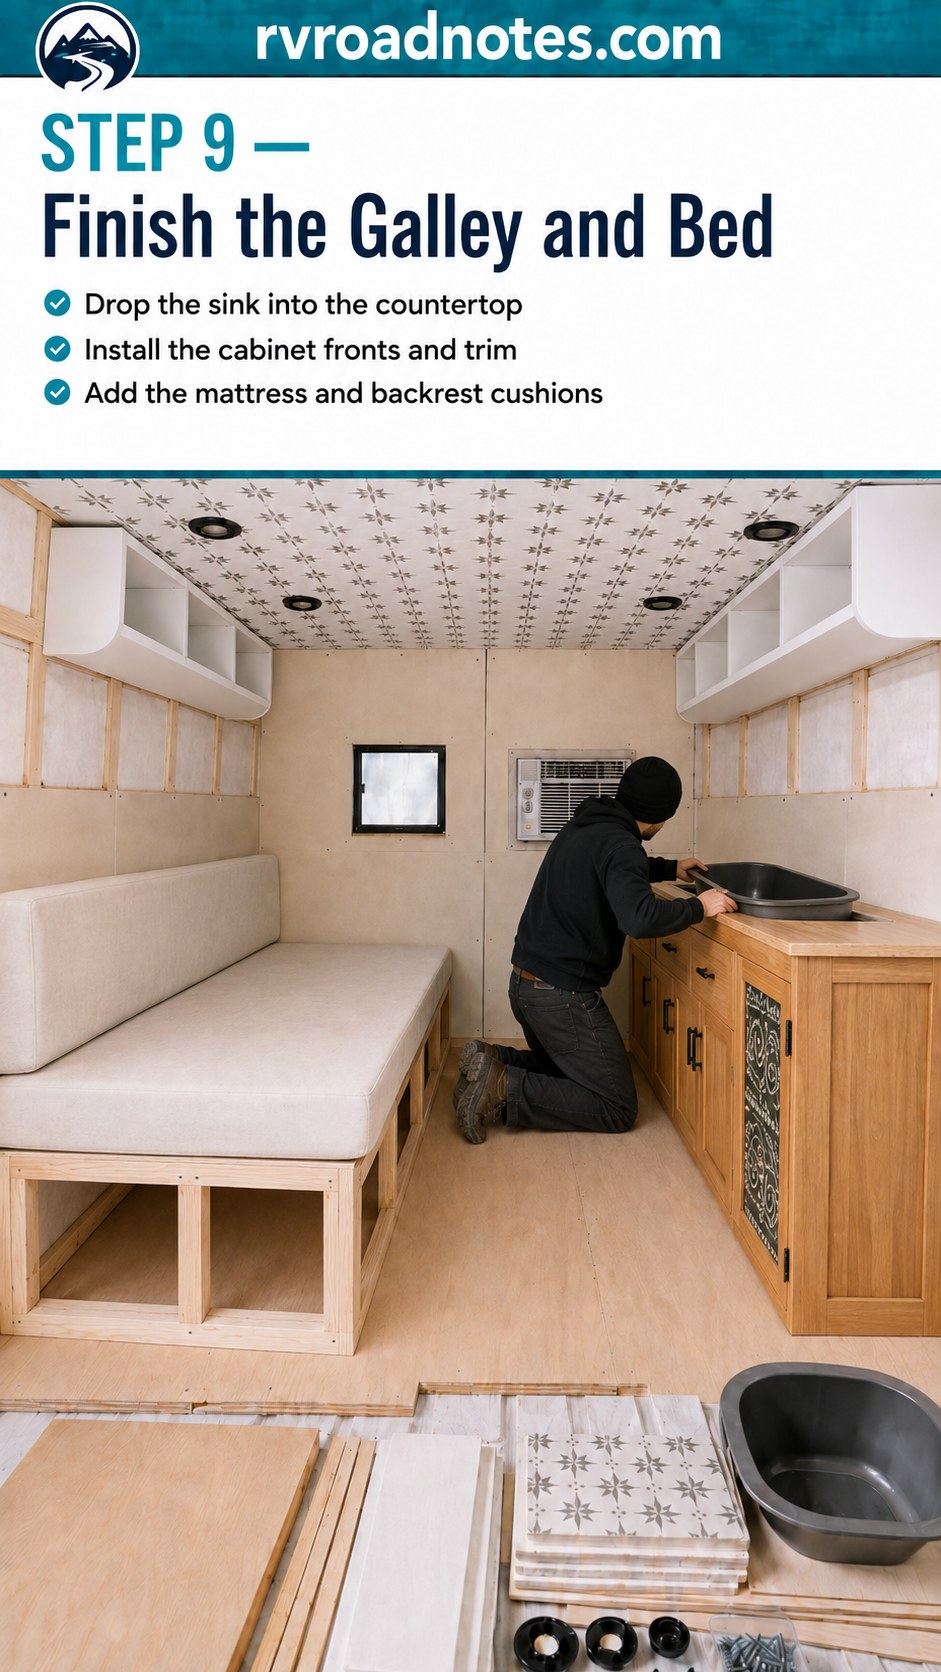
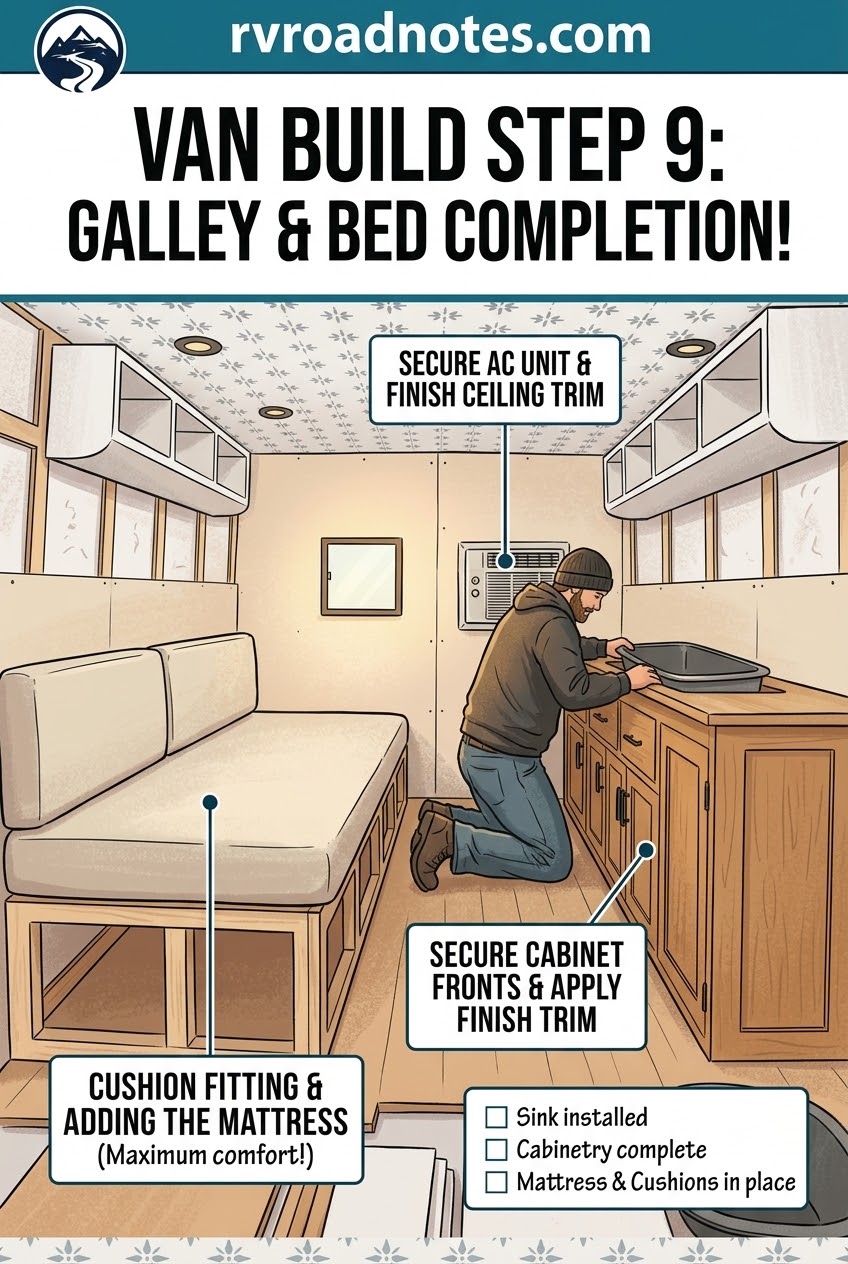
Last step, and the one that makes the whole build feel like a room instead of a job site. The sink drops into the countertop cutout, cabinet fronts and trim go on to hide exposed plywood edges, and the mattress and backrest cushions turn the bed platform into somewhere you'd actually sleep.
Looking at the finished shot next to the bare metal shell from step one, what strikes me is how much of what makes it livable — the trim, the cushions, the sink — happened in the last two steps, after weeks of framing and wiring nobody photographs for the highlight reel. That's true of my own rig too; the maintenance log is full of unglamorous entries, and the finished cabin photo never shows the subfloor underneath it.
Before you call it finished, test every outlet, seat every cabinet door, run the A/C on shore power to confirm the circuit holds, and install a carbon monoxide and propane detector if any gas appliance goes in later — even if this phase of the build is electric-only.
The finished shot next to the bare shell from step one still gets me — nine stages, a lot of sawdust, and a van that now holds a mattress instead of empty ribs. Build your own version off your own measurements, not mine, and weigh it before you love it.

- Materials
- Tools



Your Questions, Answered
Do I need a professional for the window A/C wiring?
If you're confident reading a wiring diagram and sizing a circuit, the 12V and light-fixture wiring is manageable DIY work. For the 120V shore-power circuit feeding the A/C, or anything you're not fully sure about, get a licensed electrician or RV tech to check it before you seal the panel over it.
Roof A/C or window A/C for an Econoline conversion?
This build uses a window unit set into the rear wall specifically to keep the roof clear for solar later — a real trade-off, and if you know you want roof solar down the road, the extra framing effort for a rear window A/C is worth it now.
How do I know if my Econoline can handle the weight of a full conversion?
Weigh the empty van at a CAT scale, find your GVWR on the door sticker, and treat the difference as your real material and gear budget — plywood, cabinets, water and a mattress add up faster than most people expect.
What safety gear should go in before I call this finished?
A carbon monoxide detector, and a propane detector if any gas appliance is planned, both tested monthly — plus confirmation that the A/C circuit holds on shore power before you rely on it in hot weather.