
 21.10.2026
Boondocking gets easier when your RV is set up to handle the basics without campground hookups. After years of camping on public land across the American West, I've found that the most useful improvements aren't necessarily the expensive ones. They're the systems that prevent a dead battery, an empty water tank, a disorganized kitchen, or a miserable night when the temperature drops.
My approach is to build a setup around four essentials: power, water, food, and waste management. Comfort comes next, followed by communication and recovery equipment. That order helps me spend money where it solves an actual problem rather than buying gear because it looks good in a catalog.
These 13 boondocking setup ideas cover practical upgrades for motorhomes, travel trailers, fifth wheels, and camper vans. Start with the systems your rig lacks, check the manufacturer's limits, and add equipment according to the length of your trips and the conditions you expect to encounter.
What to prioritize first
- Calculate daily electricity and water needs before buying equipment.
- Organize cooking, storage, and sanitation for easy daily use.
- Carry recovery supplies and a communication backup appropriate for remote roads.
- Check current land-use rules, fire restrictions, and waste-disposal requirements before departure.
Solar Power System for Off-Grid Living
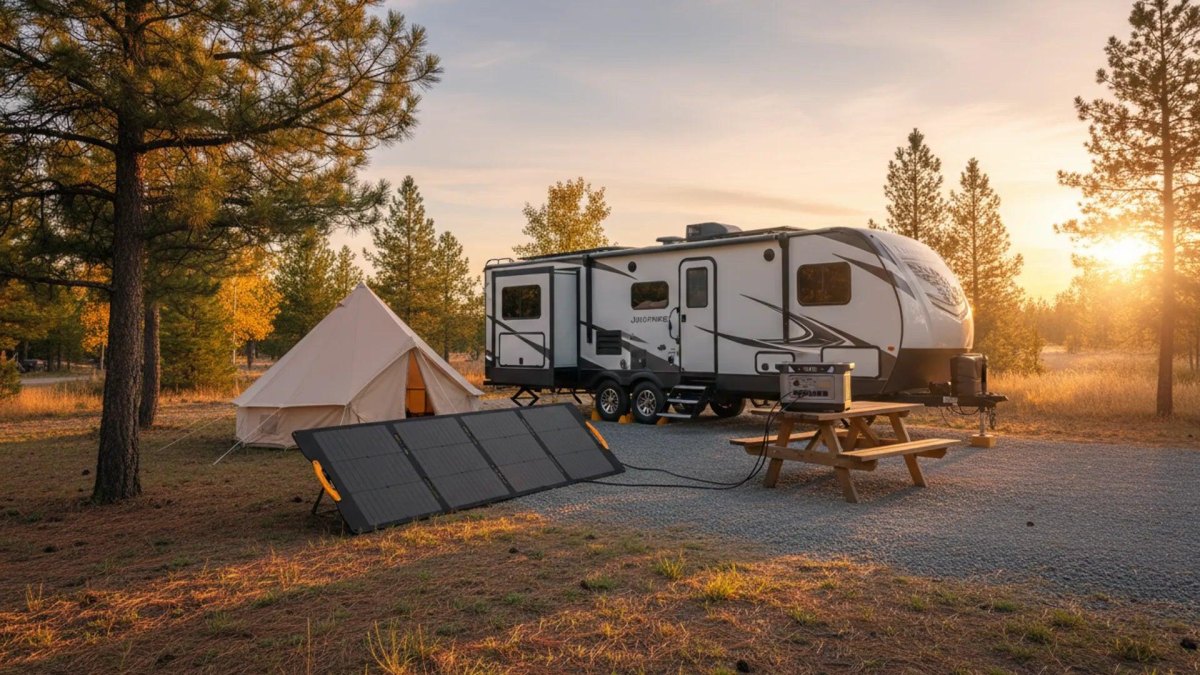
Solar power is one of the most useful upgrades for repeated boondocking, but panel wattage alone doesn't tell me whether a system will meet my needs. I start by estimating daily electricity consumption in watt-hours. A refrigerator, ventilation fan, lights, water pump, laptop, and phone chargers all contribute to the total, and their combined demand determines the system size.
For example, equipment using 600 watt-hours per day needs at least that much usable energy delivered daily, plus enough capacity to account for conversion losses and days with weak sunlight. Actual production varies with shade, panel angle, season, cloud cover, and location. Roof-mounted panels are convenient while driving and parked, whereas portable panels let me position the array in sunlight when the RV sits under trees.
My planning rule
Size the battery for the energy you need between charging opportunities and size the solar array for realistic daily replenishment. The two components solve different problems.A battery monitor helps identify whether the system is recovering each day or gradually running down. Lithium batteries can offer substantial usable capacity and lower weight than many lead-acid alternatives, but charging temperature limits, battery management, wiring protection, and inverter compatibility matter. Have a qualified RV electrical professional handle work beyond your knowledge. The U.S. Department of Energy's solar and storage overview explains why generation and storage work together to provide power when sunlight is unavailable.
Compact Outdoor Kitchen and Cooking Station
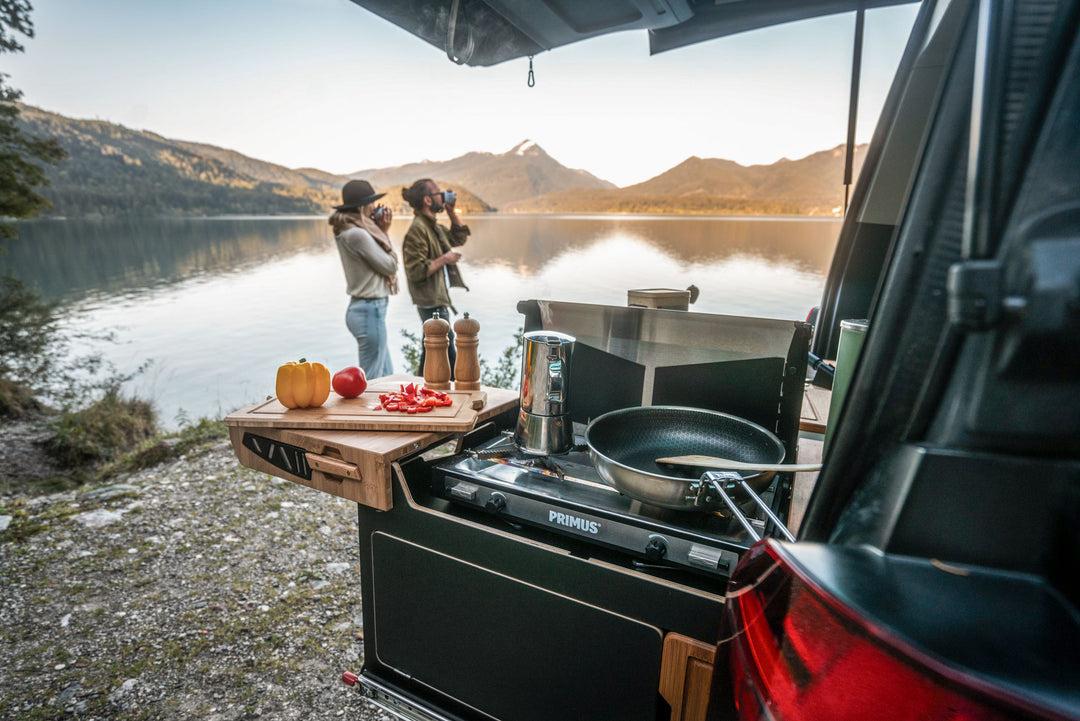
An outdoor kitchen gives me more working room without requiring a permanent interior renovation. A folding table, a stable cooking surface, a washable preparation mat, and a lidded container for utensils can turn a cramped campsite into a practical cooking area. Keep the frequently used items together so meal preparation doesn't involve unpacking half the RV.
Choose a stove suited to the meals you actually prepare. A single-burner stove works for simple meals, while a two-burner model is useful for cooking a main dish and a side simultaneously. A windscreen can improve performance where permitted by the stove manufacturer, but it must not cause dangerous heat buildup around the appliance or fuel system.
Cook outdoors only in a suitable, well-ventilated location and follow the appliance manufacturer's instructions. Never use an outdoor stove inside the RV or use the RV cooktop or oven to heat the living space. Check current fire restrictions before using any flame-based appliance, and use an alternative when restrictions or conditions make outdoor cooking unsafe.
Keep food safe
Plan meals around your refrigeration capacity. The USDA's camping food-safety guidance recommends keeping cold foods at 40°F (4.4°C) or below, separating raw meat from ready-to-eat foods, and using a food thermometer to check doneness.Portable Water Storage and Filtration System
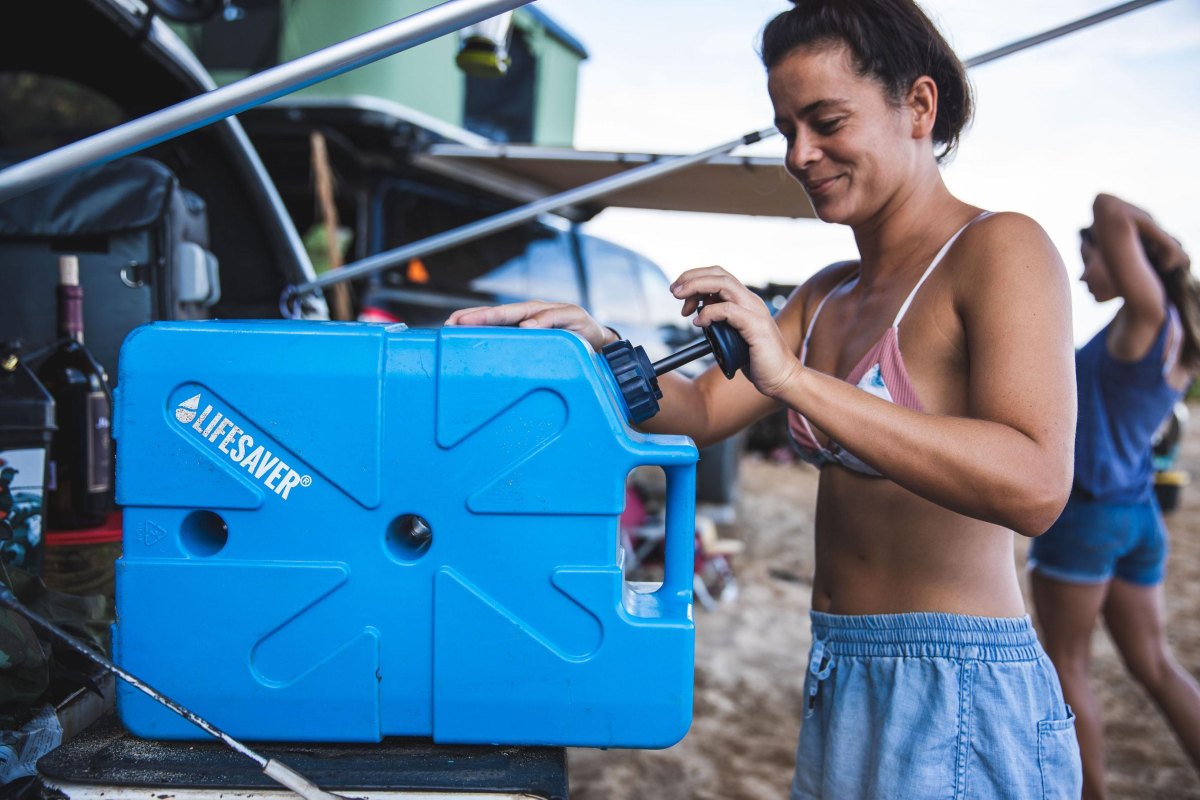
Water planning is one of the easiest ways to make an off-grid stay less stressful. I work backward from the number of people, the length of the trip, the weather, and whether the RV's built-in tank will be enough. Drinking, cooking, washing hands, cleaning dishes, and showering all compete for the same supply. Hot weather and longer stays increase demand.
Food-grade water containers provide useful reserve capacity when the main tank is small or a refill point is far away. Secure them for travel and account for their weight: one U.S. gallon of water weighs about 8.34 pounds, before the container itself is included. Never let extra water push the vehicle beyond its rated cargo capacity or axle limits.
Use dedicated potable-water containers, label them clearly, and keep their interiors and fittings clean. If collecting water from an uncertain source, don't assume that clear water is safe to drink. Treatment needs depend on the contaminants present; a filter that removes some bacteria or protozoa may not remove viruses or chemical pollutants.
Do not gamble with drinking water
Use a known safe supply whenever possible. If treatment is necessary, follow the CDC's current water-treatment guidance for camping and travel. The CDC identifies boiling as an effective method for killing germs and recommends appropriate treatment when water safety is uncertain.For stored emergency drinking water, the CDC recommends at least one gallon per person per day for three days, with additional water when conditions or individual needs warrant it. That is an emergency baseline, not a complete estimate for all RV activities. Its water-storage guidance also explains container selection and replacement schedules.
Comfortable Campsite With an Awning and Shade
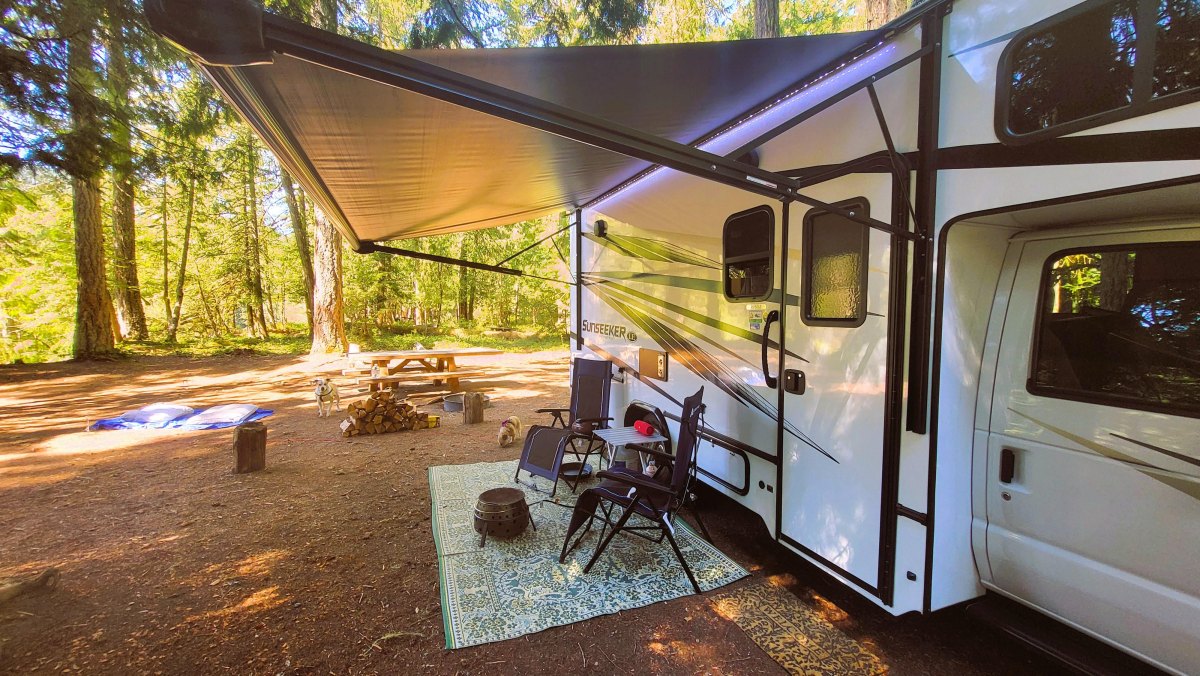
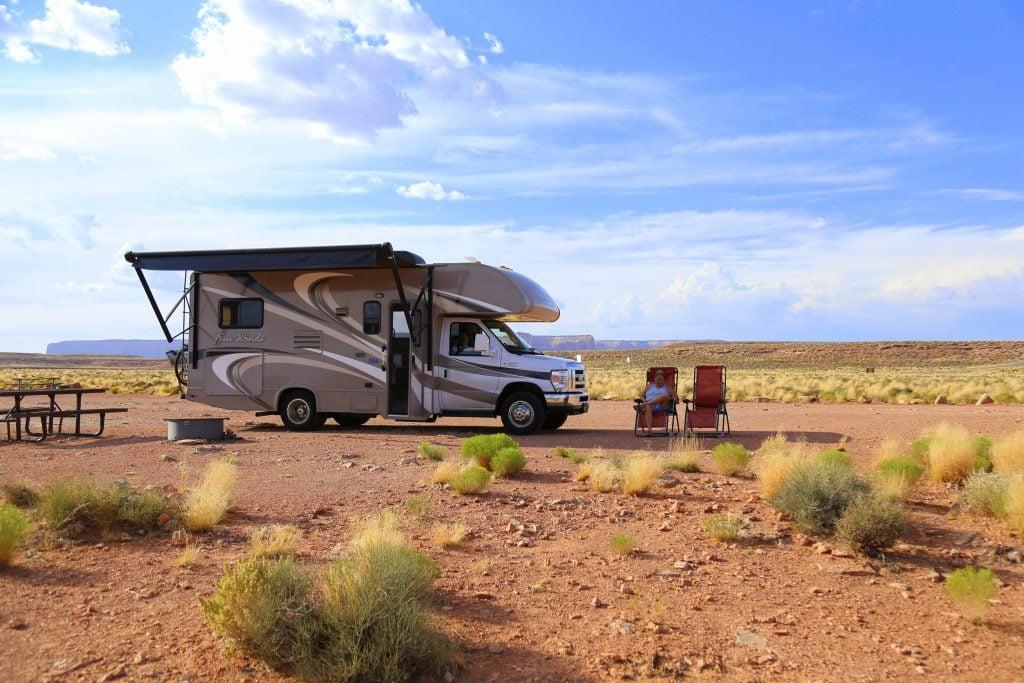
Shade makes an immediate difference during warm-weather boondocking. An awning can protect an outdoor seating area and reduce direct sunlight entering the RV, while a separate freestanding shelter may suit a van or a campsite where the vehicle's awning cannot be positioned conveniently. I choose equipment based on wind exposure, available ground, and the time needed to secure it properly.
Wind is the main reason not to treat an awning as permanent outdoor furniture. Retract it when conditions exceed the manufacturer's limits, when strong gusts are expected, or whenever leaving it unattended would be risky. Use the supplied anchoring method where appropriate, and avoid staking into buried utilities or damaging vegetation.
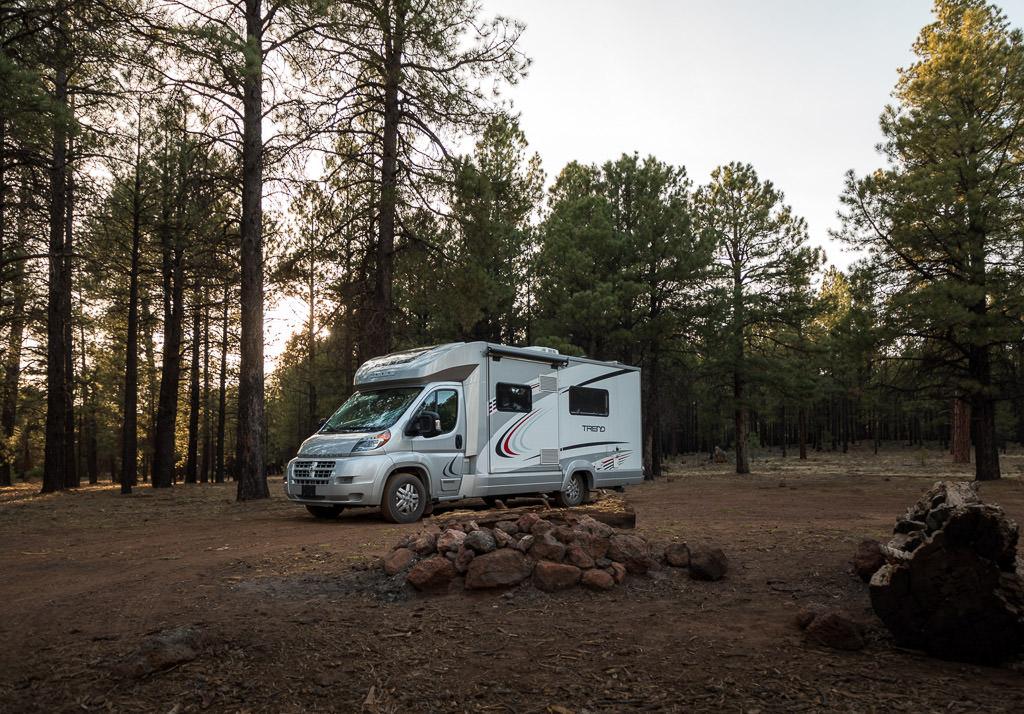
Position the RV and outdoor area on an established, durable campsite rather than creating a new clearing. Before deploying equipment, check overhead branches, vehicle access, and the path needed to leave in an emergency. A level, shaded seating area with a small table and a washable mat usually adds more practical comfort than a large collection of outdoor accessories.
Public-land rules vary by location. The Bureau of Land Management's camping guidance explains dispersed camping, stay limits, and the importance of checking local restrictions. Confirm that the site is open and legal before setting up, even if it appears to be an established pullout.
Space-Saving Storage and Organization Solutions
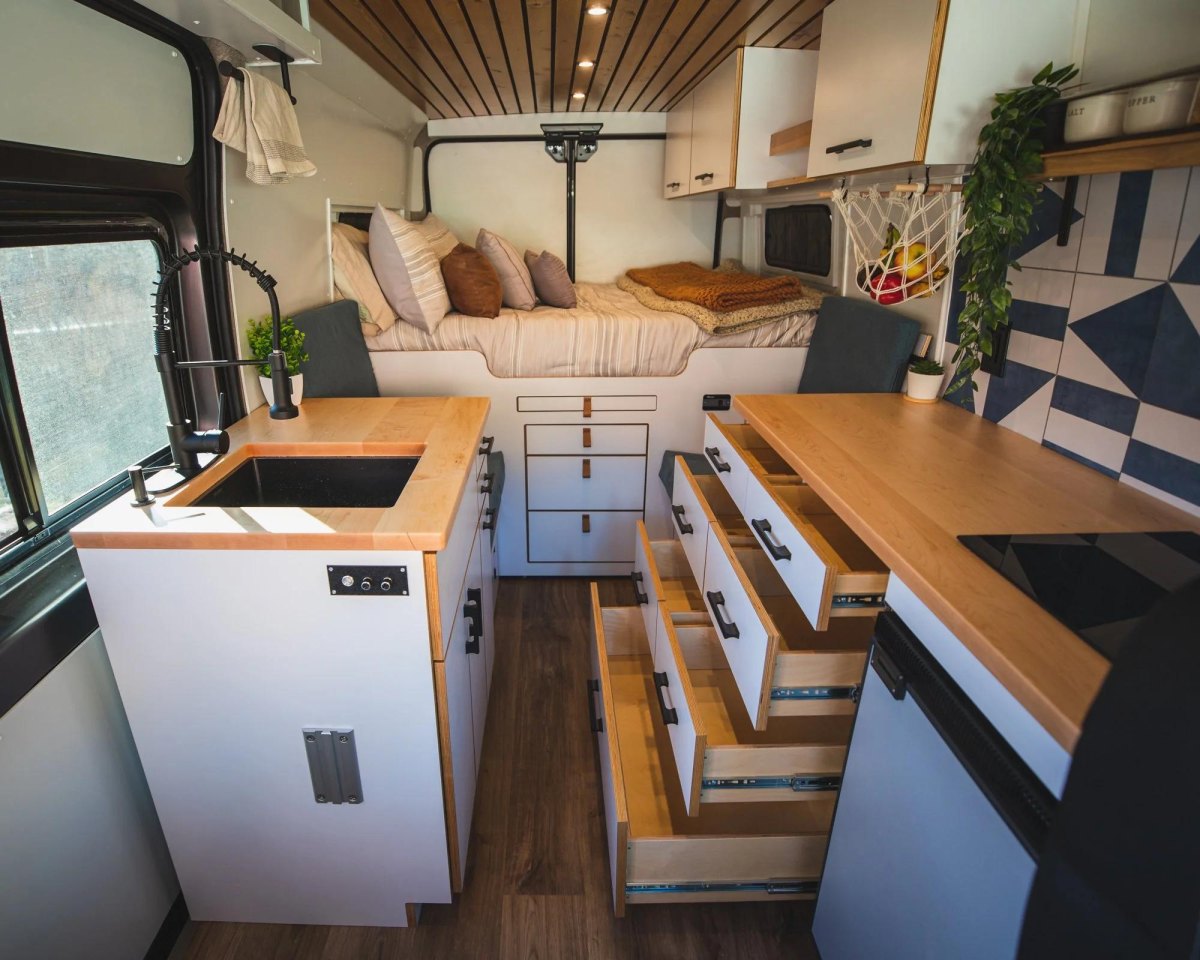
Good storage should make supplies easy to find and keep them from moving while the RV is in transit. I favor shallow bins, drawer dividers, labeled containers, and designated places for tools, food, toiletries, and electrical accessories. Clear containers are useful for supplies that need frequent checking, while opaque bins work well for items that benefit from protection from light.
Use the space under beds and dinette benches for lightweight items that are not needed every day. Keep emergency equipment accessible rather than buried beneath seasonal clothing or spare bedding. Heavy objects should be secured low and positioned according to the vehicle manufacturer's loading guidance so that storage improvements don't create a handling problem.
Travel trailers and fifth wheels require particular attention to cargo distribution and tongue or pin weight. Motorhomes also have limits for gross vehicle weight and individual axles. The number on a storage bin is not the important number; the actual loaded vehicle weight is.
An easy first project
Empty one cabinet at a time, remove duplicate supplies, and put the remaining items into categories. Then secure the containers and take a short drive to check for shifting before heading onto rough roads.Before adding shelving, heavy drawers, or permanent cabinetry, check the available payload and how the modification affects access to wiring, plumbing, and service panels. Storage is most effective when it improves access without adding unnecessary weight.
Portable Power Station and Battery Backup
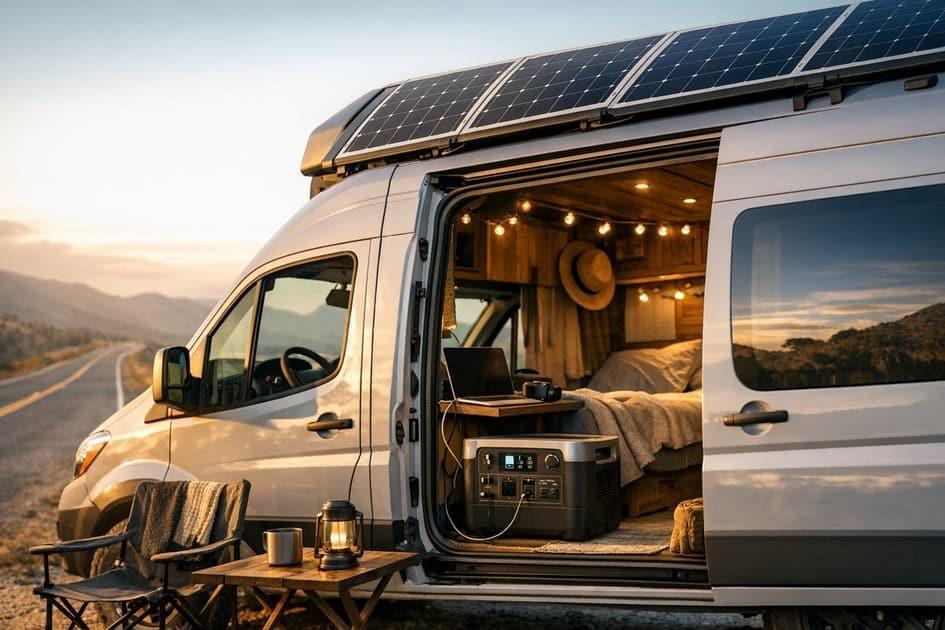
A portable power station can be a sensible backup for smaller rigs, weekend campers, or travelers who want electricity without immediately modifying the RV. Depending on its capacity and outputs, it may run phones, laptops, lights, camera batteries, and selected low-power appliances. It is not automatically a replacement for a properly sized house-battery system.
Check two specifications before buying. Watt-hours describe stored energy, while watts describe the power the unit can deliver at a given moment. A device with a high energy capacity may still be unable to start an appliance whose startup demand exceeds the inverter's rating. AC conversion also introduces losses, so the energy available at an outlet will be lower than the battery's nominal capacity.
For instance, a 500-watt-hour unit cannot be expected to run a 100-watt device for a full five hours through an AC outlet because some energy is lost in conversion and the usable capacity may be limited by the device's specifications. Refrigerators, coffee makers, hair dryers, and air conditioners need individual evaluation rather than guesswork.
Treat the battery as electrical equipment
Follow the manufacturer's charging, temperature, ventilation, and storage requirements. Use compatible charging equipment, protect cables from damage, and do not improvise connections to the RV's electrical system. Never operate a fuel-powered generator inside the RV, beneath it, or near a window, vent, or air intake.For a larger RV, an integrated house-battery system may be a better long-term investment than several portable units. The Department of Energy's explanation of solar and energy storage is a useful starting point for understanding the relationship between charging, stored energy, and electrical loads.
Efficient Off-Grid Lighting With LED Lanterns
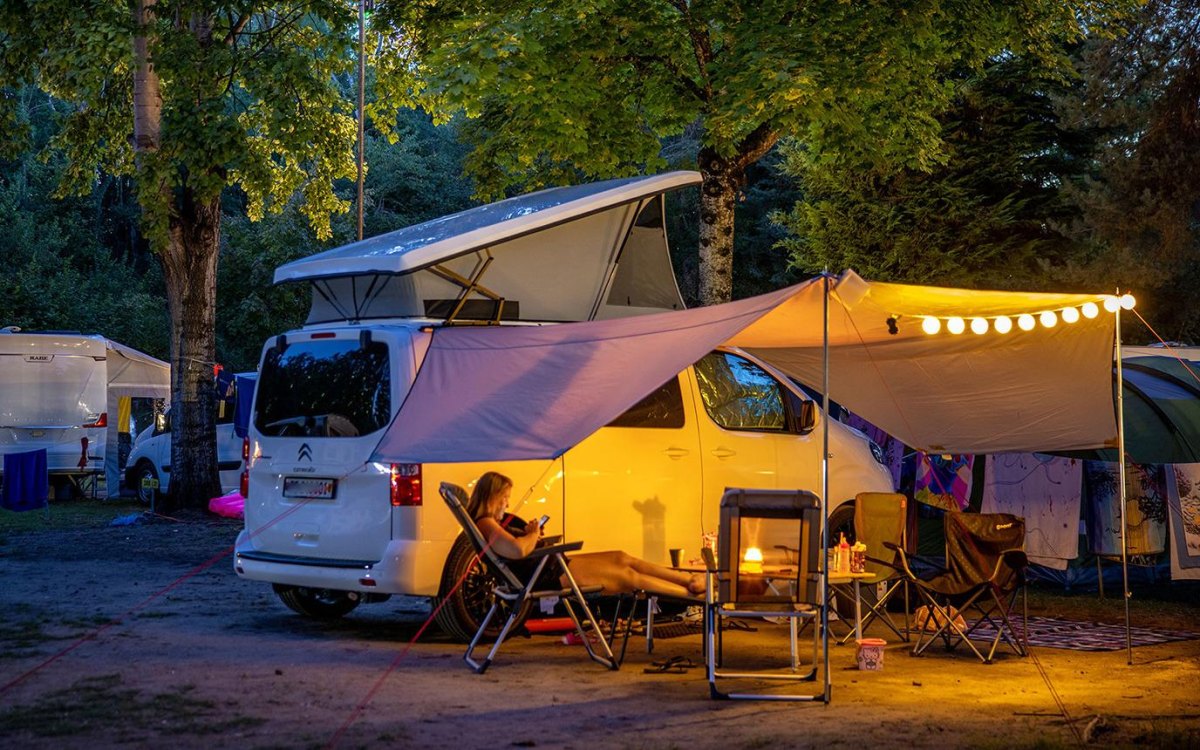
Lighting is a simple upgrade with a direct effect on battery use and campsite convenience. LED fixtures generally use less electricity than older incandescent alternatives, and a rechargeable lantern can provide useful light without adding another permanently wired circuit. I like having separate lights for cooking, moving around outside, and reading inside the RV.
A headlamp is useful for checking a tire, handling a water connection, or keeping both hands free while packing away equipment. A small lantern works well on the table, while low-level path lighting helps reduce trips over guy lines, uneven ground, and gear. Choose lights with controls that are easy to operate in the dark and batteries that can be recharged from the power system you already carry.
Warm, adjustable lighting is usually more comfortable around the seating area than a single bright floodlight. Aim lights at the work surface instead of shining them into neighboring campsites or across the surrounding landscape. This also helps preserve night vision and limits unnecessary light pollution.
Check fire restrictions
Battery-powered LED lights avoid an open flame, making them a practical choice when fire risk is elevated. Fuel-burning lanterns and campfires may be subject to local restrictions, so consult the relevant land manager's current rules before use. The U.S. Forest Service publishes forest-specific alerts and fire information.Keep a spare charged light where it can be reached without unpacking the entire storage compartment. Rechargeable lights are only useful as emergency equipment if they are charged before the emergency begins.
All-Terrain Recovery Gear and Vehicle Essentials
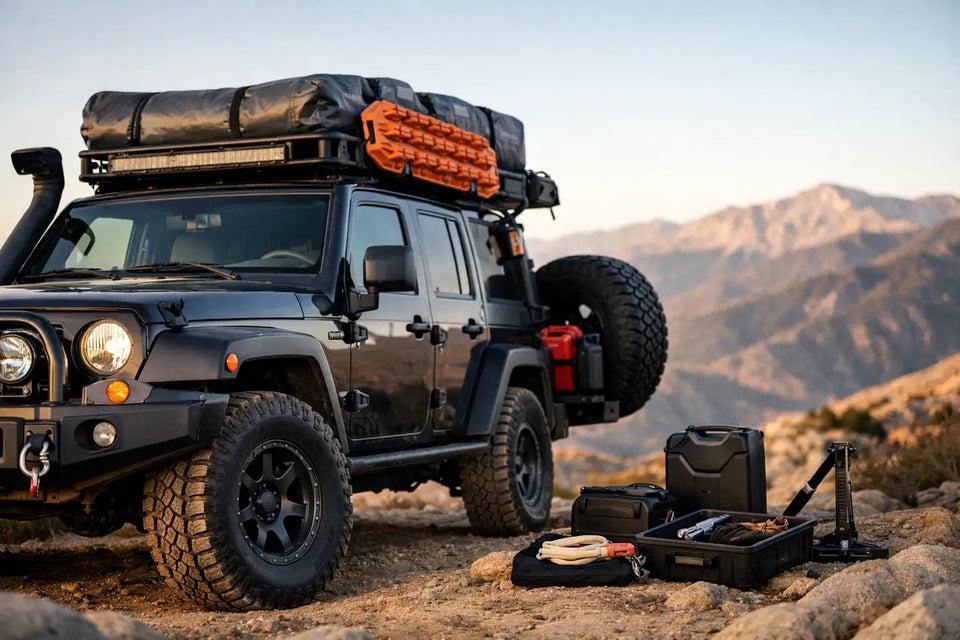
Remote camping can involve washboard roads, loose gravel, sand, mud, steep approaches, and long distances from assistance. The best recovery setup begins with choosing a suitable route for the vehicle rather than relying on equipment to overcome every obstacle. Check road conditions, clearance, weather, and turnaround options before leaving a maintained road.
A practical roadside kit includes a tire-pressure gauge, a correctly rated jack and suitable base, a wheel tool that fits the vehicle, a first-aid kit, gloves, a flashlight, drinking water, and basic repair supplies. A portable air compressor and traction boards may be useful for compatible vehicles and terrain. Their usefulness depends on the vehicle's weight, tires, clearance, and the driver's knowledge of safe recovery procedures.
Before buying recovery equipment, read the vehicle and equipment manufacturers' instructions. Recovery points, straps, shackles, and winches must be rated and used for the actual loads involved. Never attach a recovery strap to an unsuitable bumper, hitch ball, or improvised point, and keep bystanders clear of loaded recovery equipment. If you are unsure about the recovery method, stop and arrange professional assistance.
Know when to turn around
Traction boards do not make a road safe for an overloaded motorhome or a long trailer with inadequate clearance. If the road deteriorates beyond your vehicle's capability, turning around early is usually less expensive than recovery.Check tires before departure for damage, age, and pressure appropriate to the actual load and manufacturer guidance. Tire condition and pressure are especially important for heavy RVs. The National Highway Traffic Safety Administration's roadside preparedness advice covers emergency supplies, route planning, and basic vehicle readiness.
Portable Toilet and Private Outdoor Shower
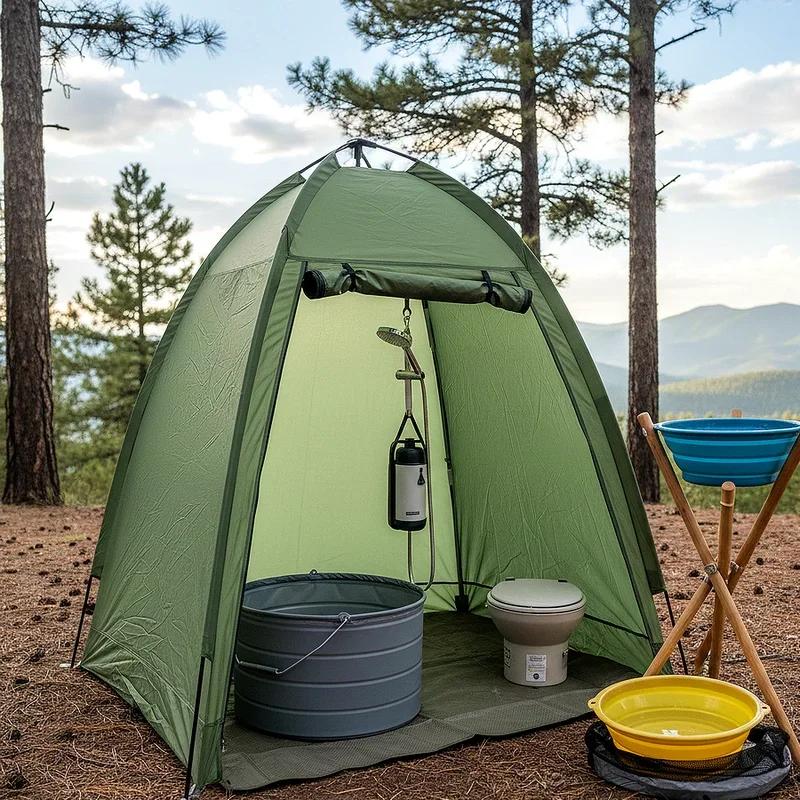
A portable toilet and a privacy shelter can make longer boondocking stays considerably more comfortable, especially when the RV has limited bathroom facilities. A portable cassette toilet, a self-contained chemical toilet, or a purpose-designed bag system may suit different trip lengths and vehicle layouts. The right choice depends on storage space, capacity, ease of cleaning, and the disposal facilities available along the route.
Set up a shower shelter on a stable surface where runoff can be managed legally. A low-flow showerhead, a small basin, and a measured supply of warm water can reduce consumption. Keep soap, towels, and clean clothes organized in a separate container so that the shower area does not become another sprawling storage problem.
Plan sanitation before arriving at a remote site. Some public lands require human waste to be packed out; others specify designated toilets or allow particular disposal methods under defined conditions. Do not assume that burying waste is permitted everywhere. Where it is permitted, follow the managing agency's distance, depth, and site requirements. Never empty a portable toilet into a storm drain, onto the ground, into a stream, or into an unauthorized facility.
Protect water sources
The CDC advises keeping toileting and washing areas at least 200 feet from water sources, food preparation areas, and campsites when facilities are unavailable. Its outdoor camping hygiene guidance also emphasizes handwashing and the use of clean water. Local rules may be stricter and always take priority.Use an approved dump station or other authorized disposal facility for cassette and holding-tank waste. If your chosen site lacks suitable sanitation options, shorten the stay or choose a different location rather than leaving waste behind.
Insulation and Ventilation for Year-Round Comfort
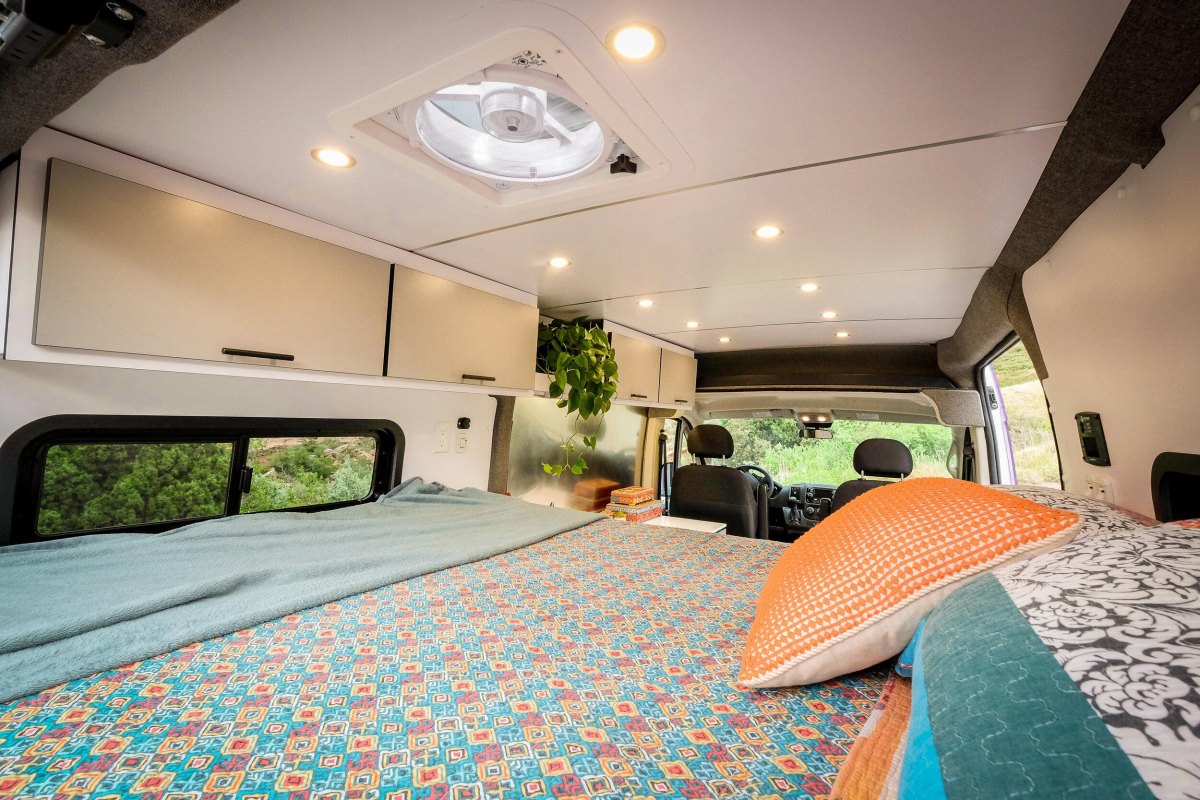
Comfort in an RV depends on controlling heat loss, solar gain, drafts, and moisture. Insulated window covers can reduce cold drafts in winter and limit heat entering through sun-facing windows. Door seals, roof vents, and window frames deserve attention because small gaps can make heating and cooling less effective.
Ventilation is just as important as insulation. Cooking, showering, and breathing release moisture into a compact living space. Without adequate airflow, condensation can collect on windows and hidden surfaces, encouraging mold and potentially damaging interior materials. Use the installed exhaust fan when cooking or showering, and ventilate according to the weather and appliance instructions.
For colder trips, use insulation products intended for the relevant application and ensure they do not block required ventilation, emergency exits, appliance clearances, or safety equipment. Tank and pipe protection depends on the RV's design; an insulated cabin does not guarantee that plumbing exposed underneath the vehicle will remain above freezing.
Do not improvise cabin heating
Never use a cooktop, oven, or unvented fuel-burning heater to heat the RV. Keep carbon monoxide and propane detectors operational, test them according to their instructions, and replace them at the specified end of service life. If a detector alarms, leave the vehicle and follow the appropriate emergency procedure.Cold-weather preparation varies by rig, so consult the owner's manual for tank, plumbing, heating, and winterization requirements. The RV Industry Association's winter preparation guidance discusses window insulation, roof-vent heat loss, and protection of water systems. If plumbing or heating modifications require work beyond your skills, hire a qualified RV technician.
Reliable Internet and Communication Equipment
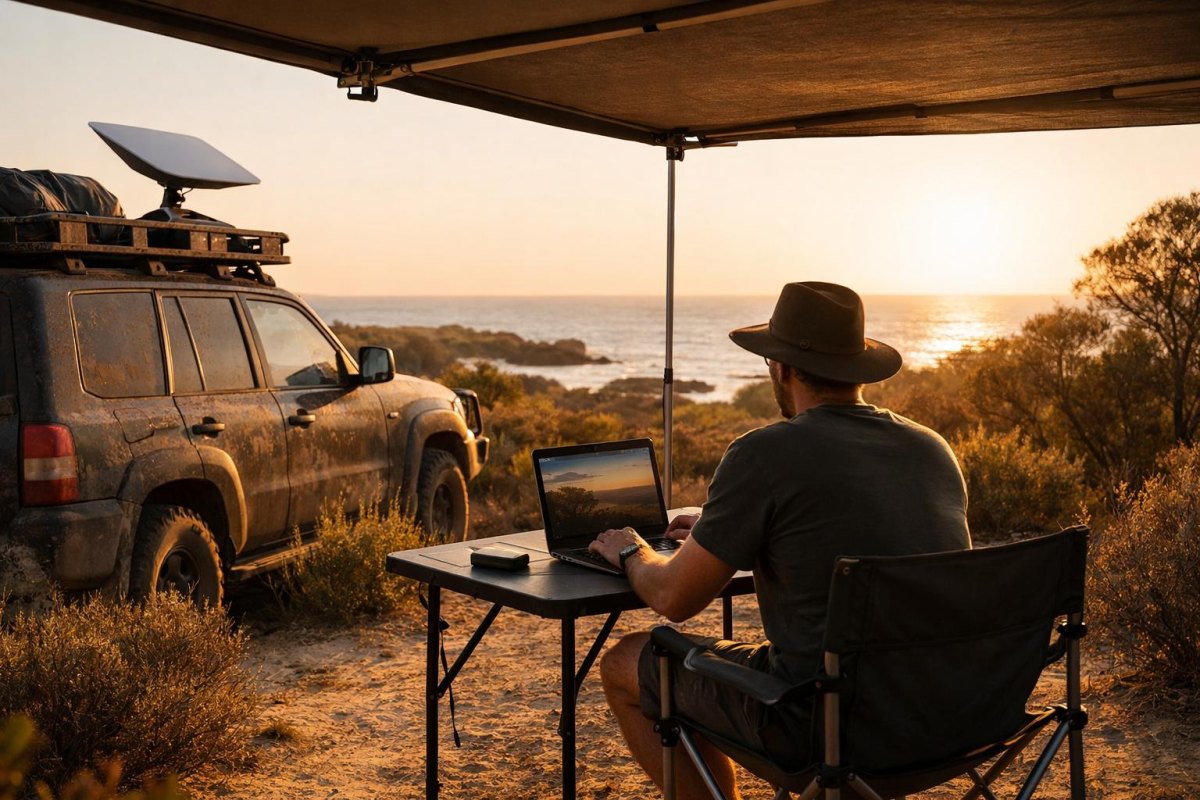
Reliable connectivity can be essential for remote work, navigation, weather updates, and arranging help. The right setup depends on how far you travel from cell coverage and whether you need a connection for occasional messages or continuous video calls. A cellular hotspot may be sufficient near towns and highways, while a satellite internet terminal can provide another option in locations with a suitable view of the sky.
Before choosing hardware, review coverage maps for your usual routes and the data limits, roaming rules, and power requirements of each service. Satellite equipment may need an unobstructed sky view and can draw meaningful power during extended use. A portable mounting arrangement gives flexibility, but secure the equipment against wind and pack it away before driving.
Keep offline maps, campground and land-manager information, emergency contacts, and essential documents available on the phone or another device. A paper map is still useful when electronics fail or a route requires a last-minute change. For truly remote trips, consider a satellite messenger or personal locator beacon appropriate to your needs and learn how it works before departure.
Build a communication backup
Save local emergency numbers and check in with a trusted contact when traveling beyond reliable coverage. Explain your route and expected return time, and establish what they should do if you miss the check-in.Internet access and emergency messaging are not interchangeable. A satellite internet dish is not automatically a rescue beacon, and cellular coverage can disappear between mapped service areas. Check current service terms and consult the Federal Communications Commission for relevant communications information before relying on a device in remote terrain.
Outdoor Living Area With Rugs and Folding Furniture
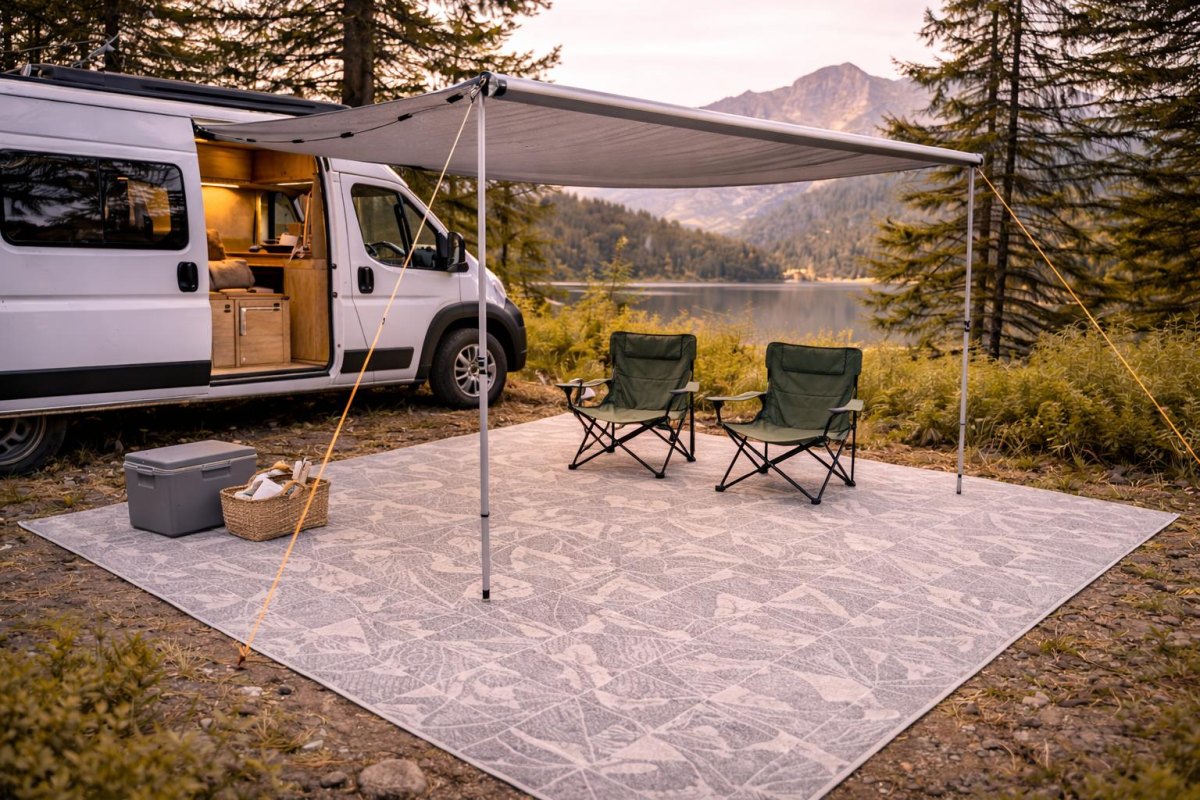
A comfortable outdoor living area does not need much equipment. Two folding chairs, a compact table, and a breathable outdoor rug can provide a useful place to eat, read, or work. Choose furniture that folds flat, is easy to clean, and fits securely into an existing storage compartment without displacing essential gear.
For boondocking, I prefer outdoor rugs that let air and water pass through rather than heavy mats that trap moisture or smother vegetation. Place them on an established, durable surface and avoid spreading furniture across delicate plants or creating new vehicle tracks. Gravel and rock can be practical seating areas, provided the ground is stable and the setup does not obstruct access.
Wind can turn lightweight furniture into a nuisance, so fold or secure chairs and tables before leaving the campsite or when gusts increase. Keep walkways clear, especially around the RV steps, utility compartments, and emergency exits. Furniture should also be packed away before driving; nothing intended for campsite use should become unsecured cargo.
Follow local land-management rules for campsite placement, vehicle access, and stay duration. The U.S. Fish and Wildlife Service's Leave No Trace principles recommend using established campsites and durable surfaces while keeping campsites small. A compact seating arrangement makes it easier to enjoy the site without expanding your footprint.
Waste Management and Leave-No-Trace Essentials
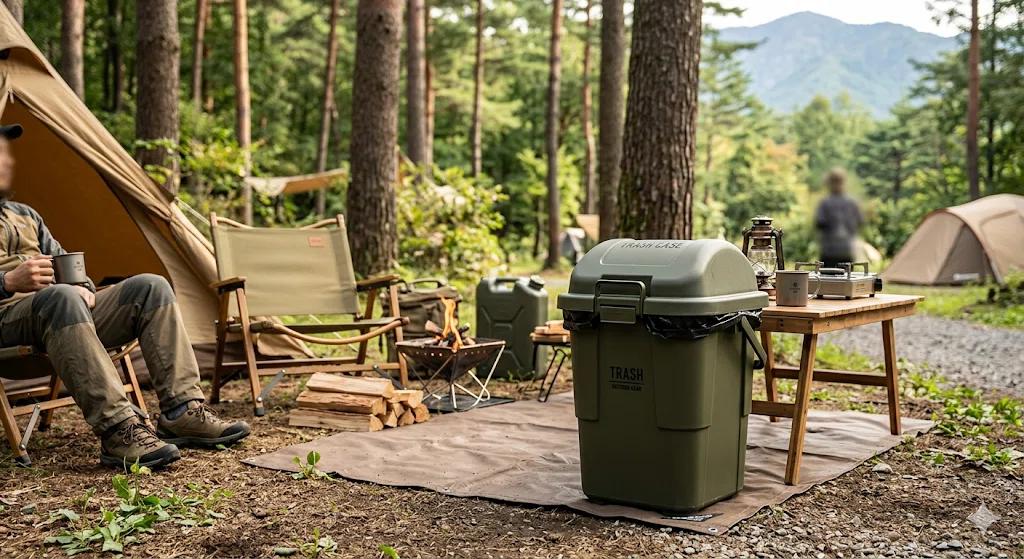
Boondocking means planning for waste removal instead of assuming a bin will be nearby. I separate ordinary trash, recyclables where facilities exist, food scraps, and items that need special disposal. A sealed, washable container helps contain odors and keeps lightweight packaging from blowing around the campsite. Store food and scented waste securely according to local wildlife guidance.
Greywater and blackwater require the same attention as solid trash. Follow the rules for the specific public land, and use approved dump stations for RV holding tanks and portable toilet waste. Do not discharge greywater onto the ground or into waterways unless the land manager explicitly permits the specific practice. Biodegradable soap does not make it acceptable to wash directly in a lake or stream.
Before departure, walk the entire campsite and check under the RV, around the chairs, near the fire ring if one is permitted, and along the route used to carry supplies. Collect food scraps, small plastic fragments, cigarette butts, and anything else brought in. Leave the area without adding a new fire ring, damaging plants, or widening an existing track.
Check the rules before arrival
The BLM camping page explains that dispersed camping restrictions and stay limits vary by location. The Leave No Trace principles also cover packing out trash, selecting durable campsites, and protecting water sources. Check current closures and fire restrictions with the managing agency before every trip.- Confirm the site is open and camping is permitted.
- Know where the nearest authorized dump station and potable-water source are located.
- Carry sealed trash storage and enough supplies to pack out all waste.
- Follow local human-waste and greywater disposal rules.
- Inspect the campsite before leaving and remove every item you brought.
A good boondocking setup is one that lets you stay comfortably without depending on services the location does not provide. Prioritize reliable power, sufficient water, safe cooking, secure storage, and legal waste disposal first. Add the comfort upgrades and communications equipment that suit your trips, and leave enough room in the budget for maintenance and an unexpected change of plan.
More Pinterest Visuals



 RV Maintenance & Care17 Essential RV Winter Storage Tips to Prevent Cold-Weather Damage
 RV Pet Travel11 RV Cat Tree Ideas That Make Small Spaces More Cat-Friendly
 Camping Gear & Planning15 RV Must-Haves for Beginners to Camp Safely and Comfortably
 Camping Recipes18 Easy RV Camping Snacks Ideas for Road Trips and Campfire Nights