
 04.11.2026
Putting an RV away for winter involves more than parking it, disconnecting the battery, and throwing a cover over it. A few overlooked details can turn several months of storage into a plumbing repair, damaged battery, mold problem, or expensive tire replacement.
I recommend working through winter preparation in a consistent order, starting with cleaning and inspections before moving on to the water system, electrical components, and exterior protection. The right procedure also depends on whether you own a motorhome, travel trailer, fifth wheel, or camper van, so keep your RV owner's manual nearby.
These 17 RV winter storage tips cover the jobs that matter most. The goal is straightforward: protect the equipment, prevent avoidable damage, and have fewer repairs waiting when camping season returns. The guidance below reflects manufacturer and industry recommendations available in November 2026.
Choose a Dry, Level Location for RV Storage
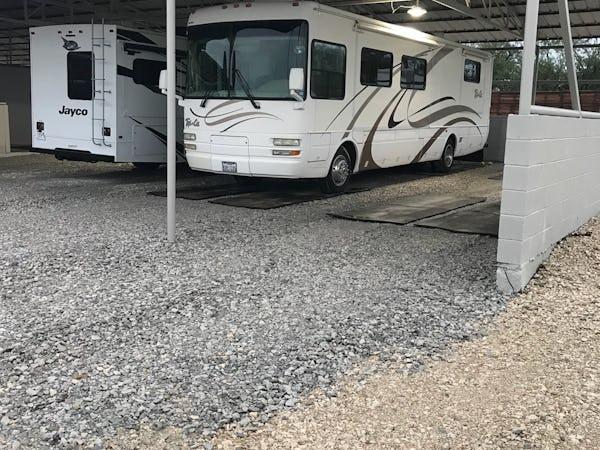
Start by finding a storage location that protects the RV from standing water, excessive moisture, and unnecessary exposure to the elements. A covered storage building is useful, but a properly drained outdoor space can also work. What matters most is having a firm, level, well-drained surface that supports the RV without allowing the tires or stabilizers to sink.
Concrete and compacted gravel are generally practical choices. Avoid low areas where rainwater collects, locations beneath trees that drop heavy branches, and ground that becomes muddy after snowmelt. If you are storing a motorhome, check overhead clearance before parking beneath a roof or structure.
Level the RV using the equipment and procedures specified by its manufacturer. Travel trailers and fifth wheels may have different support requirements from motorhomes. Never use stabilizing jacks as substitutes for properly rated structural supports. Also check local storage restrictions and security arrangements before committing to a location.
Thoroughly Clean the RV Inside and Out
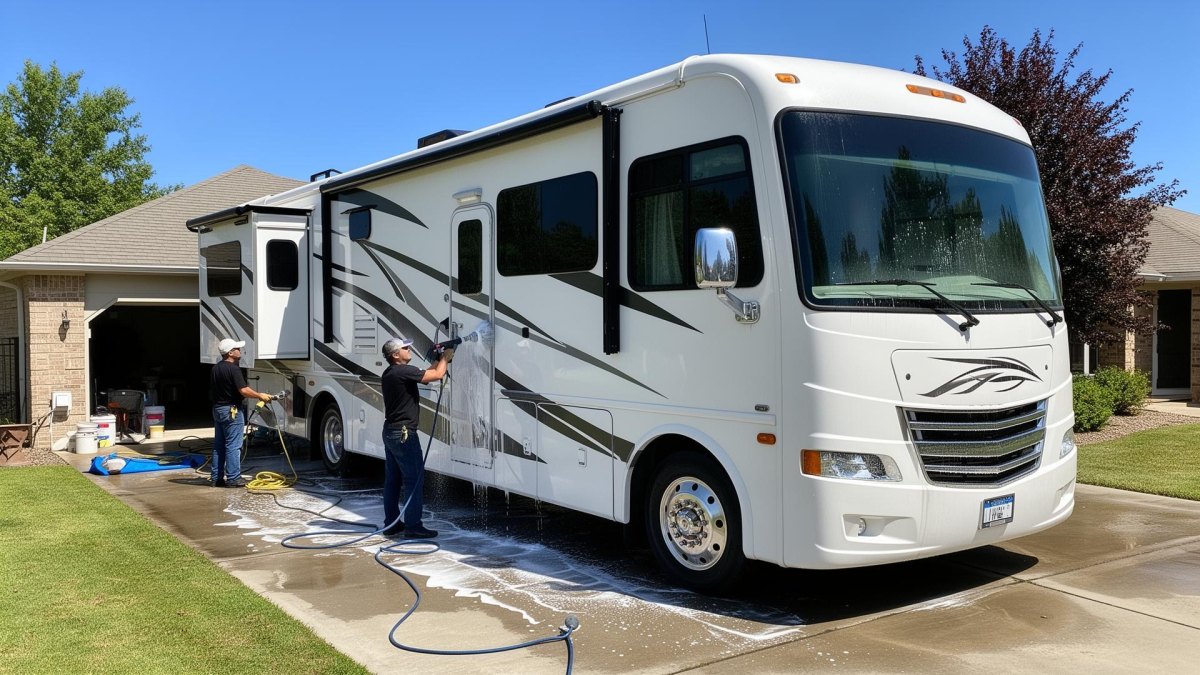
Cleaning before storage removes the dirt, food residue, and organic material that can cause problems over several months. Wash the exterior with products approved for your RV's finish, paying attention to the roof, awning, wheel wells, and lower body panels. Remove bird droppings, tree sap, road salt, and other deposits that can damage exterior surfaces.
Inside, remove every perishable food item, including anything tucked into cabinets or storage compartments. Vacuum crumbs, wipe countertops, clean the bathroom, and empty the refrigerator and freezer. Wash and dry the refrigerator interior, then leave its doors propped open if the manufacturer permits it. Complete drying is important because trapped moisture encourages odors and mildew.
Remove bedding, damp towels, clothing, and other textiles that can hold moisture. Stand removable cushions upright to improve airflow, and clean storage compartments before closing them. A clean RV is also easier to inspect for leaks, pests, and damage during the winter.
Inspect and Repair the Roof Before Winter
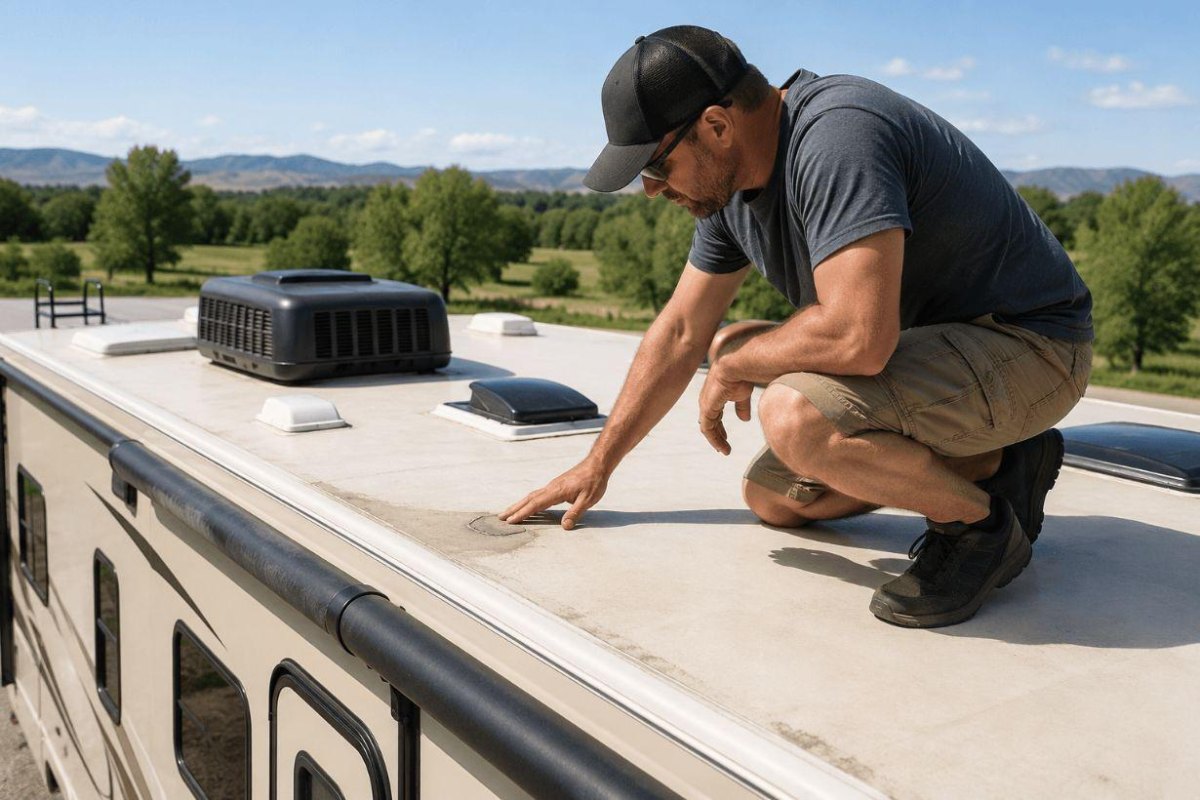
The roof deserves particular attention because even a small opening can allow water to enter while the RV sits unattended. Inspect the membrane or roof surface for punctures, loose material, cracks, and damaged seams. Pay special attention to roof vents, skylights, antennas, air-conditioning units, plumbing penetrations, and the front and rear roof transitions.
Check the existing sealant for lifting, separation, cracking, or gaps. If repairs are needed, use only products compatible with the roof material and existing sealant. Different RV manufacturers use different roofing materials, so a product suitable for one unit may damage another. Follow the manufacturer's approved resealing procedure rather than applying generic household caulk.
Roof inspections are commonly recommended at least twice yearly, including before winter storage. Never walk on a roof unless the manufacturer specifically confirms it is walkable and provides the appropriate safety instructions. If the surface is unsafe or the damage is extensive, hire an RV service professional.
Roof safety
Do not climb onto a wet, icy, or unsupported RV roof. A fall can cause serious injury, and some RV roofs are not designed to support a person's weight.
Protect the RV From Moisture and Mold
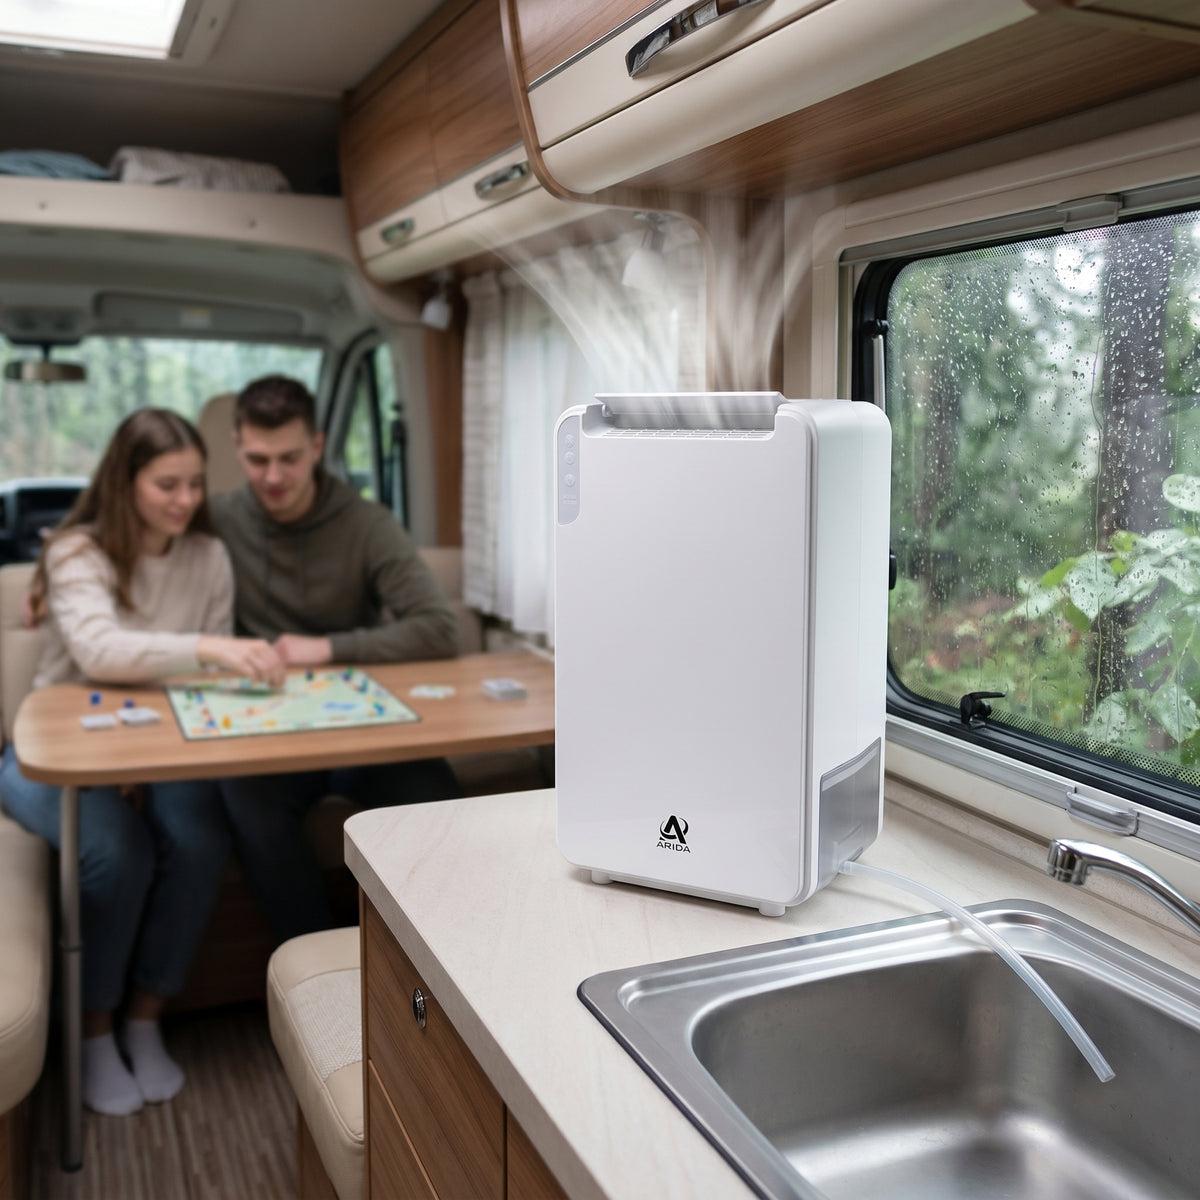
Moisture is one of the most persistent problems in long-term RV storage. Temperature changes can create condensation on windows, walls, cabinets, and other cold surfaces. If the moisture remains trapped, mold and mildew can develop, particularly around mattresses, upholstery, and enclosed storage areas.
Start by making sure the RV is completely dry before closing it up. Open cabinet doors and drawers where practical, lift cushions, and remove damp fabrics. Use a hygrometer to monitor indoor relative humidity. A useful target is 60% relative humidity or lower, although keeping it lower can provide additional protection against condensation.
- Moisture absorbers: Useful in enclosed cabinets and small spaces without electrical power.
- Electric dehumidifier: An option when reliable shore power is available and the appliance is suitable for unattended operation.
- Ventilation: Maintain appropriate airflow using manufacturer-approved vent arrangements and weather protection.
- Soft furnishings: Store removable bedding and fabrics in a dry indoor location.
Do not assume a moisture absorber will solve an active leak. Find and repair water intrusion first. Also avoid sealing every ventilation opening without checking the manufacturer's storage recommendations.
Drain the Freshwater System and Water Heater
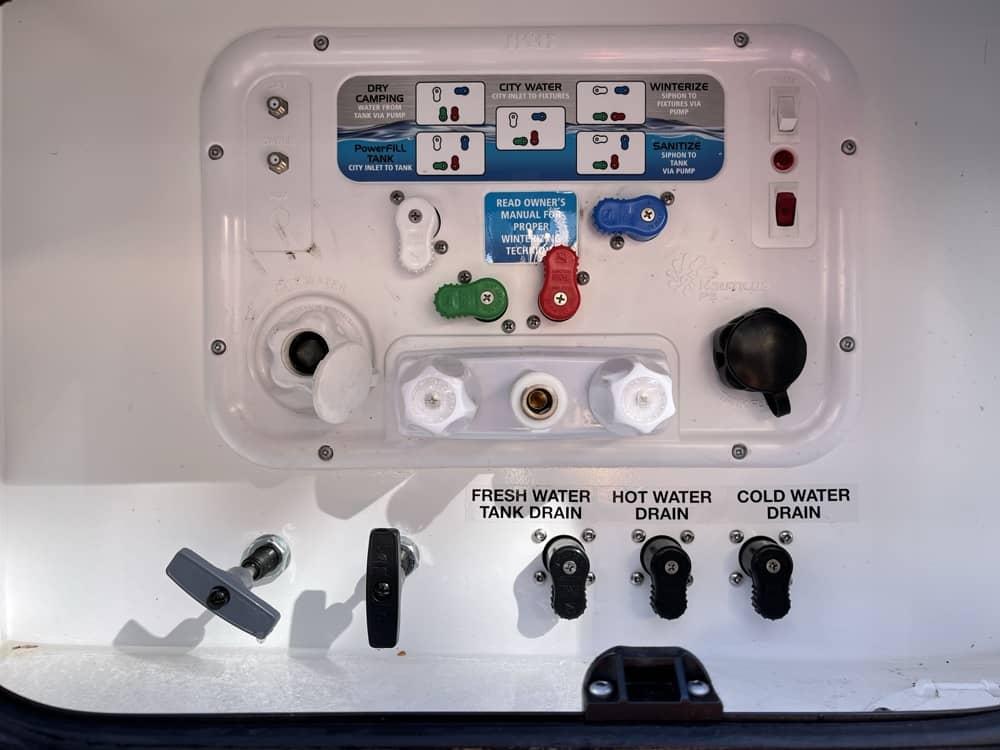
Water expands when it freezes. If water remains inside plumbing lines, fittings, tanks, or appliances, expanding ice can split components and create leaks that may not become obvious until spring. For an RV exposed to freezing temperatures, properly winterizing the complete water system is essential.
Begin by switching off the water heater and allowing it to cool completely. Disconnect the city water supply, turn off the water pump, and follow the manufacturer's instructions for draining the freshwater tank, water lines, water heater, and applicable filters. Open the appropriate faucets and low-point drains to release trapped water.
- Disconnect. Remove the city water connection and switch off the water pump.
- Cool. Allow the water heater to cool before opening its drain or service connection.
- Drain. Empty the freshwater tank, plumbing lines, and water heater according to the manual.
- Isolate. Use the designated water heater bypass where fitted.
- Check. Identify water filters, outside showers, washing machines, ice makers, and other appliances that require separate winterization.
Drain wastewater tanks at an authorized dump station and follow local disposal rules. Never discharge black or grey water onto the ground. Tankless heaters, combination heating systems, and appliances with internal water passages can require different procedures.
Add RV-Safe Antifreeze to the Plumbing System
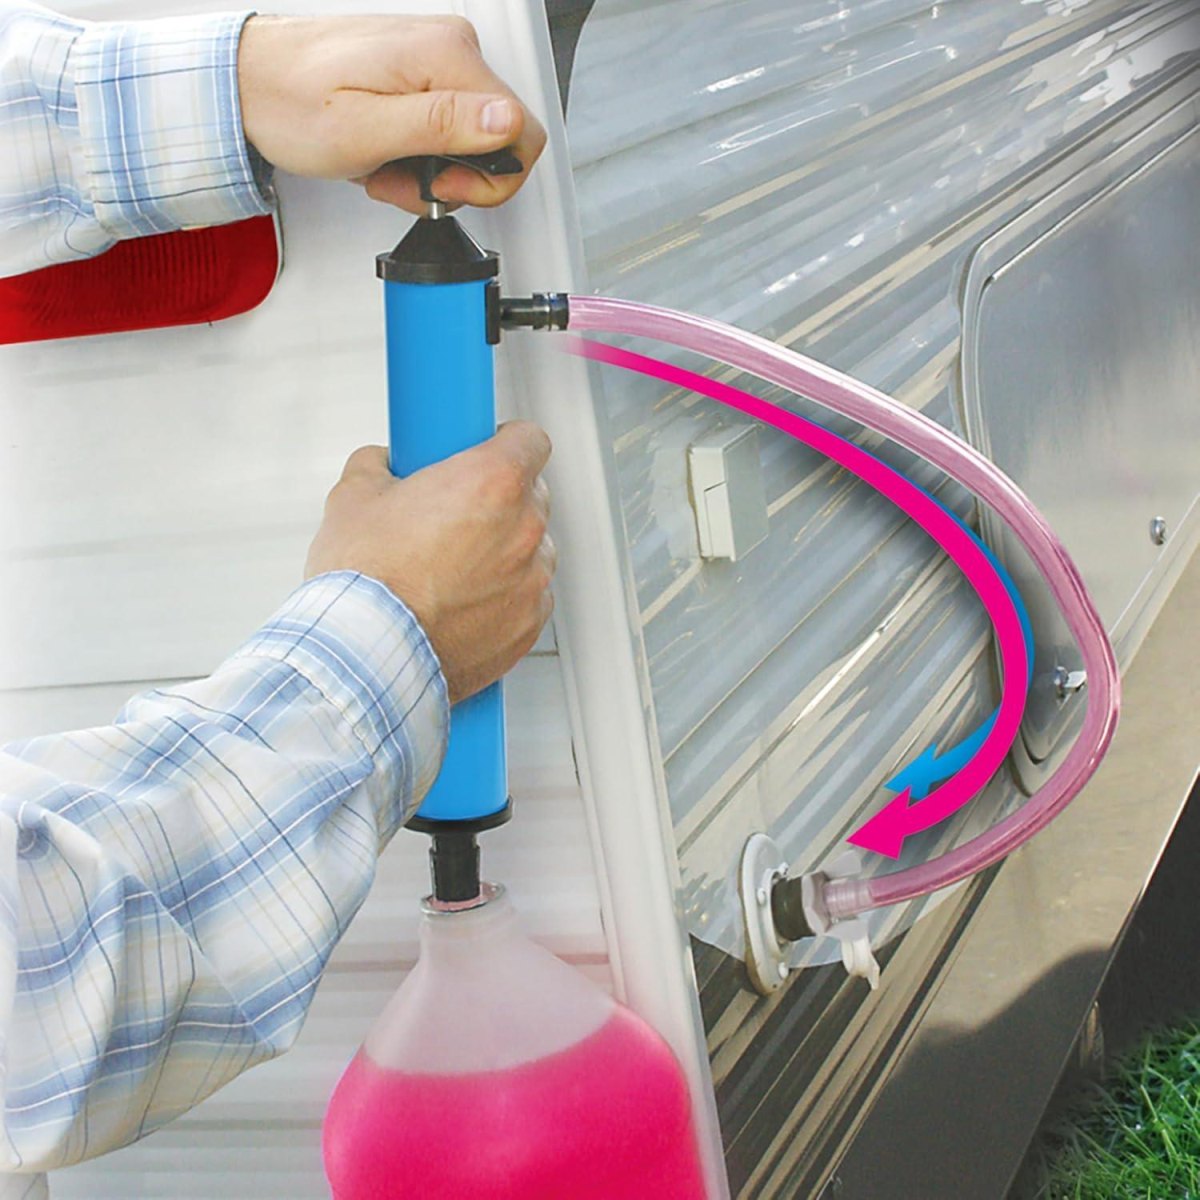
Draining the water system removes much of the water, but small amounts can remain inside pumps, valves, traps, and plumbing connections. Depending on the RV's design and the manufacturer's instructions, an additional layer of protection may be necessary.
Use only non-toxic RV plumbing antifreeze approved for the drinking-water plumbing system. These products are commonly formulated with propylene glycol or other ingredients specifically intended for RV plumbing. Automotive engine coolant and windshield washer antifreeze are not substitutes and must never be introduced into the freshwater system.
Some RVs have a winterization port that allows the water pump to draw antifreeze directly from its container. Others require a different approved arrangement. The water heater generally needs to be bypassed so that antifreeze does not unnecessarily fill the tank. Follow the exact procedure for your model, including protection for hot and cold lines, toilet valves, exterior showers, and drain traps.
A common winterization mistake
Do not assume that seeing pink antifreeze at one faucet means the entire system is protected. Every relevant branch, fixture, and drain trap needs to be addressed according to the manufacturer's procedure.
Keep unused antifreeze sealed and stored according to its label. In spring, flush the plumbing thoroughly and sanitize the freshwater system before using it for drinking or cooking.
Protect the Batteries During Cold Weather
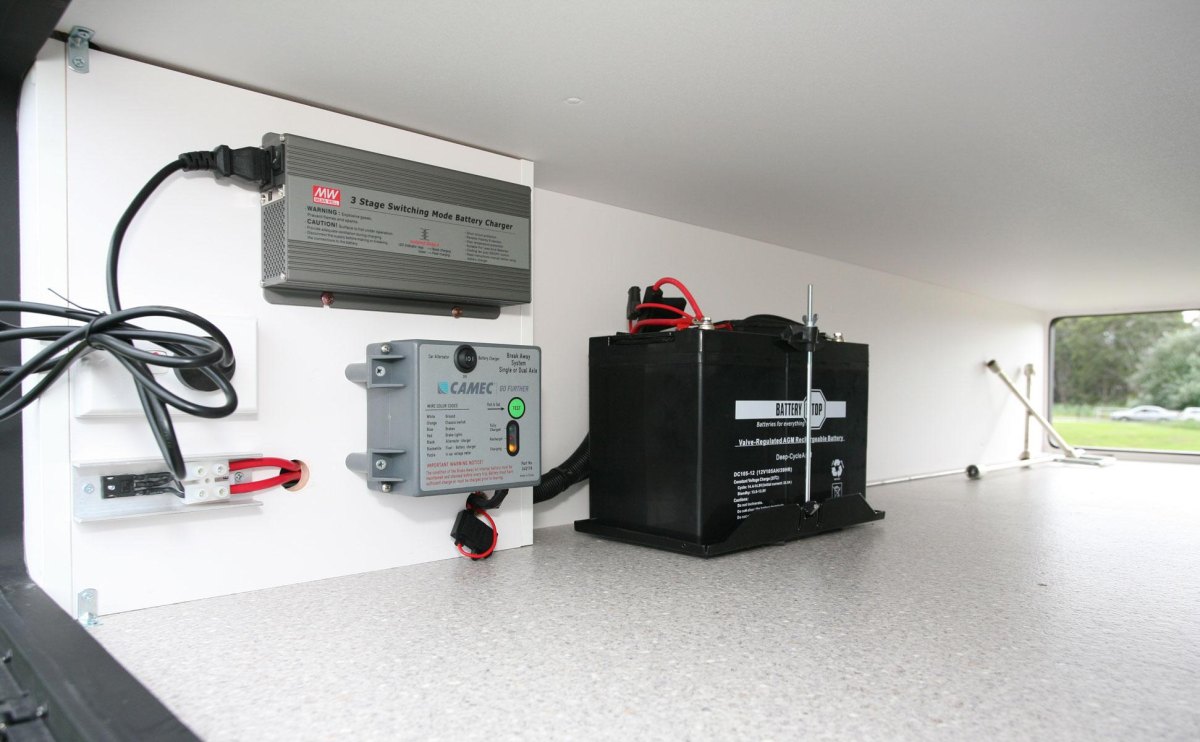
Cold temperatures can reduce battery performance, while prolonged storage can allow small electrical loads to discharge the battery. A deeply discharged battery is particularly vulnerable to damage in freezing weather. Before storage, identify whether your RV uses flooded lead-acid, AGM, or lithium batteries because their storage requirements differ.
For lead-acid batteries, check the manufacturer's charging and maintenance recommendations. Flooded batteries may require electrolyte-level checks using the specified procedure. AGM batteries are sealed and should not be opened. Lithium batteries have different preferred storage states of charge and temperature restrictions, so do not automatically apply lead-acid recommendations to them.
| Battery type | Winter storage considerations |
|---|---|
| Flooded lead-acid | Fully charge, inspect electrolyte levels, and maintain charge as specified. |
| AGM | Follow the manufacturer's storage voltage and maintenance charging instructions. |
| LiFePO4 | Use the manufacturer's recommended storage charge and observe low-temperature charging restrictions. |
Disconnect unnecessary parasitic loads using the correct battery isolation procedure. If a compatible smart maintainer is available, it may help keep batteries in the appropriate condition. However, not every charger is suitable for every battery chemistry. Check charger compatibility before leaving it connected throughout winter.
Inspect battery terminals and cables for corrosion or damage. If you remove batteries for indoor storage, use a suitable, dry, temperature-controlled location and follow the battery manufacturer's handling and ventilation requirements.
Maintain and Protect RV Tires
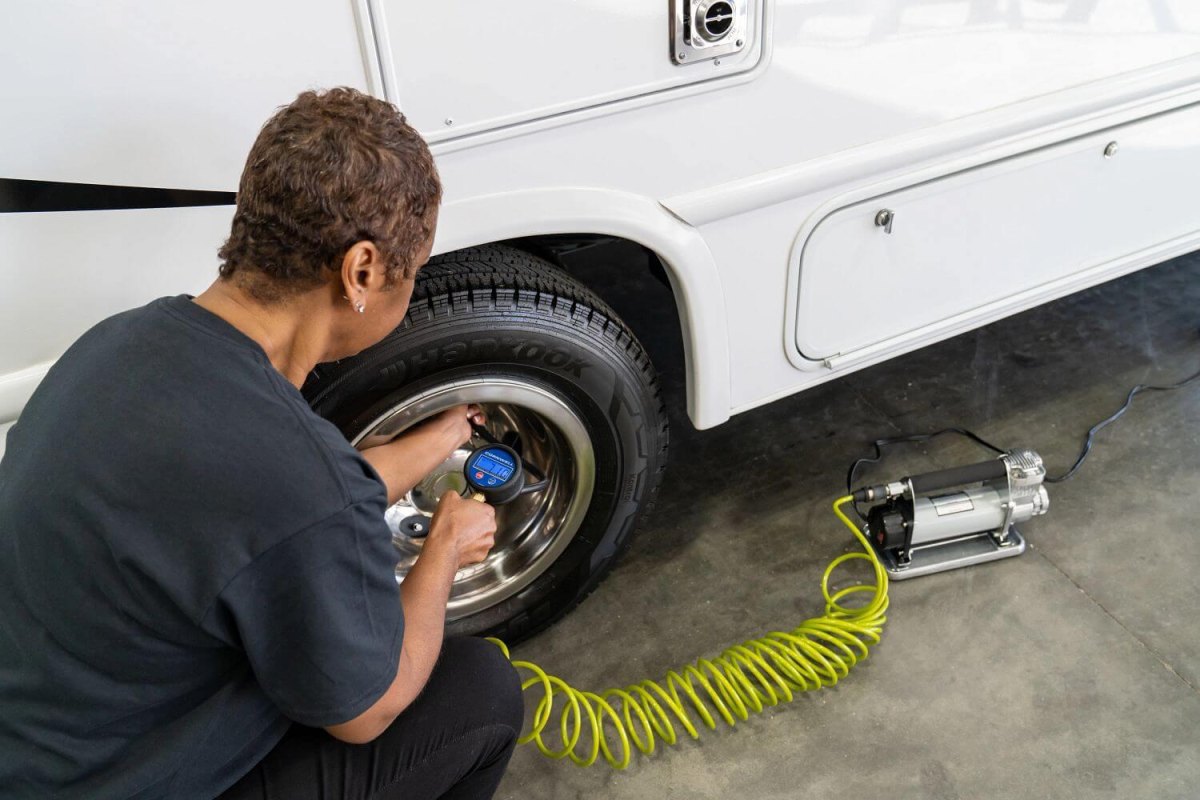
RV tires can deteriorate while a vehicle is parked, even when the tread appears to have plenty of life remaining. Long periods of exposure to sunlight, ozone, moisture, and temperature extremes can affect rubber. Extended stationary loading can also contribute to flat spotting.
Begin with a thorough inspection of each tire, including the sidewalls, tread, valve stems, and accessible inner dual tires on motorhomes. Look for cracks, bulges, cuts, and other visible damage. Check the manufacturing date codes and consult the tire manufacturer about service-life recommendations. Tread depth alone does not establish tire safety.
Inflate tires according to the RV manufacturer's pressure specifications and the actual load carried by each tire. Do not simply inflate to the maximum pressure printed on the sidewall, and do not use an arbitrary storage pressure increase without confirming that the wheel and tire manufacturers permit it. Tire covers can reduce UV exposure during outdoor storage.
Before moving the RV again
Recheck cold tire pressure, inspect for new damage, and verify the correct pressure for the loaded vehicle. If a tire has been overloaded, damaged, or stored under questionable conditions, have it assessed by a qualified tire professional.
Follow the RV and tire manufacturers' guidance on periodically moving the vehicle or using approved support equipment. Never improvise a jacking arrangement or exceed wheel, axle, or vehicle weight ratings.
Cover the RV With a Breathable Protective Cover
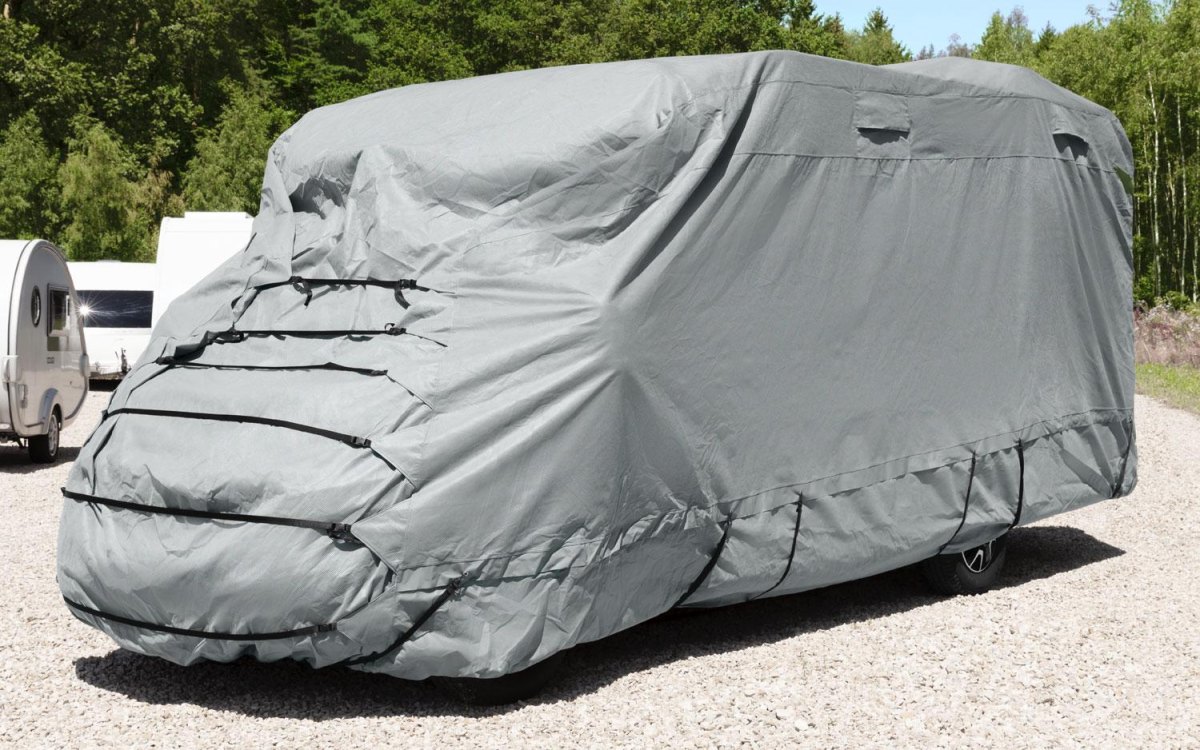
An RV cover can reduce exposure to sunlight, rain, snow, tree debris, and environmental contaminants. For vehicles stored outdoors, it is a useful way to protect the exterior finish and reduce weather-related deterioration. However, choosing the wrong cover can create additional problems.
Look for a breathable cover designed specifically for RVs and sized for your vehicle. The material should allow moisture vapor to escape while providing protection from precipitation and UV exposure. Avoid ordinary plastic tarps that trap condensation against the exterior.
Before installing the cover, wash and dry the RV. Pad sharp corners, ladder ends, and other contact points where appropriate to prevent abrasion. Secure the cover according to its instructions so it does not flap excessively in strong winds. Check compatibility with rooftop equipment, antennas, and any accessories that extend beyond the body.
Benefits
- Reduces UV exposure and exterior fading.
- Keeps leaves and debris off the roof.
- Limits direct exposure to rain and snow.
Things to watch
- Poor ventilation can trap moisture.
- Loose material can rub against exterior surfaces.
- Snow accumulation still requires inspection.
Check the cover manufacturer's maintenance instructions and inspect it periodically throughout winter. A cover is not a substitute for roof maintenance or checking for leaks.
Seal Windows, Doors, and Exterior Openings
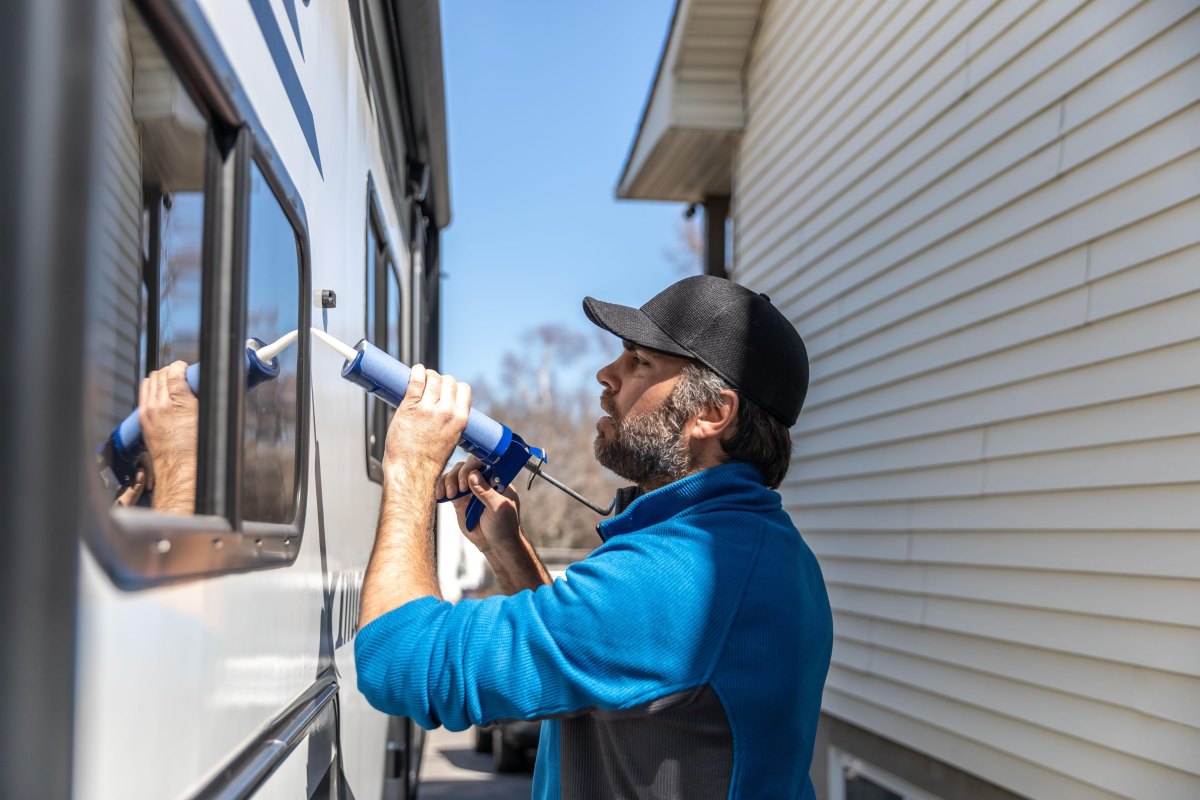
Windows, entry doors, storage compartments, and exterior access panels are potential entry points for water, drafts, and pests. Before winter storage, inspect their seals carefully. Look for flattened weatherstripping, cracks, loose edges, missing sealant, and signs of previous water intrusion.
Clean the sealing surfaces and replace damaged weatherstripping with compatible materials. Inspect window frames, roof vents, utility penetrations, and compartment doors as well. A seal that looks intact from outside may still allow water to enter, so examine nearby interior surfaces for discoloration or dampness.
Close and latch windows and doors according to the manufacturer's instructions. Keep necessary appliance ventilation openings unobstructed; do not seal furnace exhausts, refrigerator vents, or other safety-critical openings simply to keep insects out. Use approved protective screens or covers where appropriate. Maintain proper appliance ventilation even when the RV is not occupied.
Prevent Pest Infestations During Storage
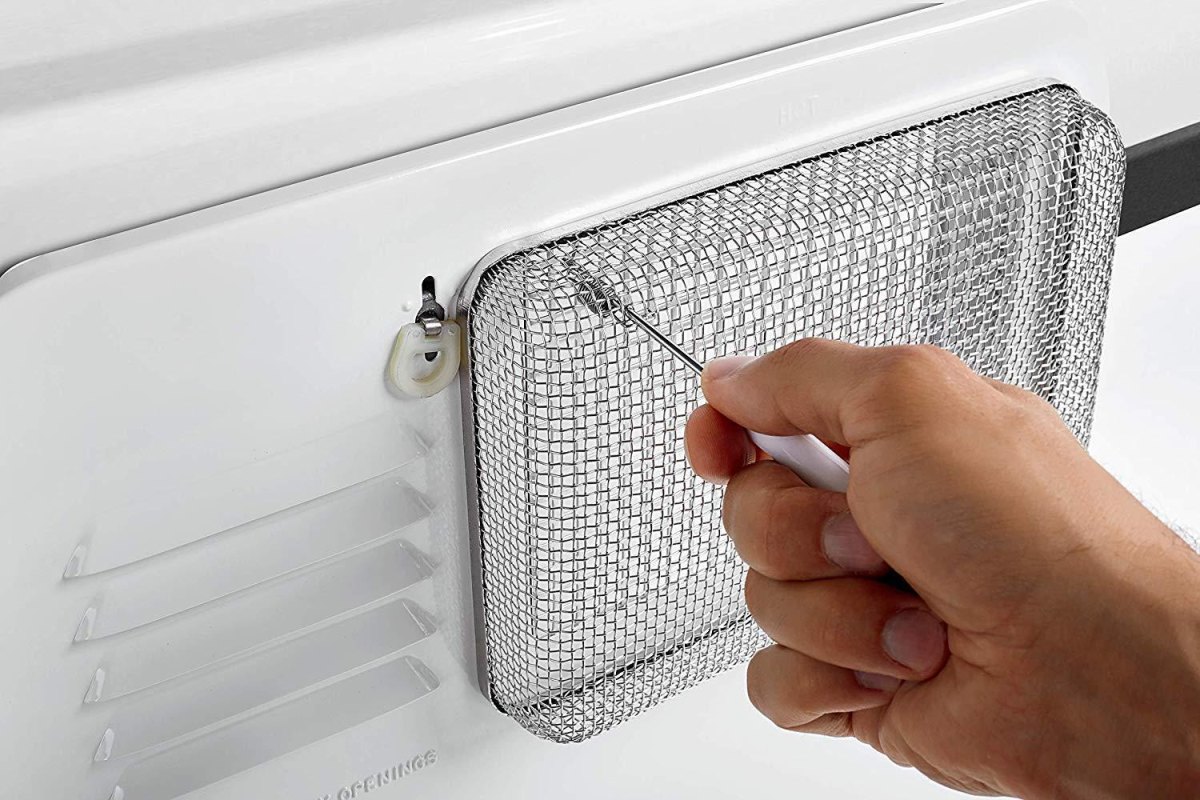
Mice and other small animals can cause surprisingly expensive damage inside a stored RV. They may chew wiring insulation, nest inside ventilation spaces, contaminate cupboards, and damage upholstery. Prevention is considerably easier than dealing with an established infestation.
Start by removing food, crumbs, rubbish, and anything that might attract animals. Inspect the underbody, utility openings, storage compartments, and spaces around plumbing and electrical penetrations. Mice can enter through openings approximately 6 millimeters wide, so even small gaps deserve attention.
- Remove all food and food packaging.
- Clean kitchen cabinets and storage compartments.
- Inspect plumbing and electrical entry points.
- Install appropriate pest-resistant screens where approved.
- Keep exterior rubbish and debris away from the RV.
- Inspect for droppings, nesting material, and gnaw marks.
- Use traps where necessary, following product instructions.
Be cautious with poison baits, particularly where children, pets, or wildlife could encounter them. If rodents have entered the vehicle, locate and seal the entry points and use suitable traps. Wear appropriate protective equipment when cleaning contaminated areas, and follow public-health guidance for rodent droppings.
Prepare the Engine and Fuel System for Winter
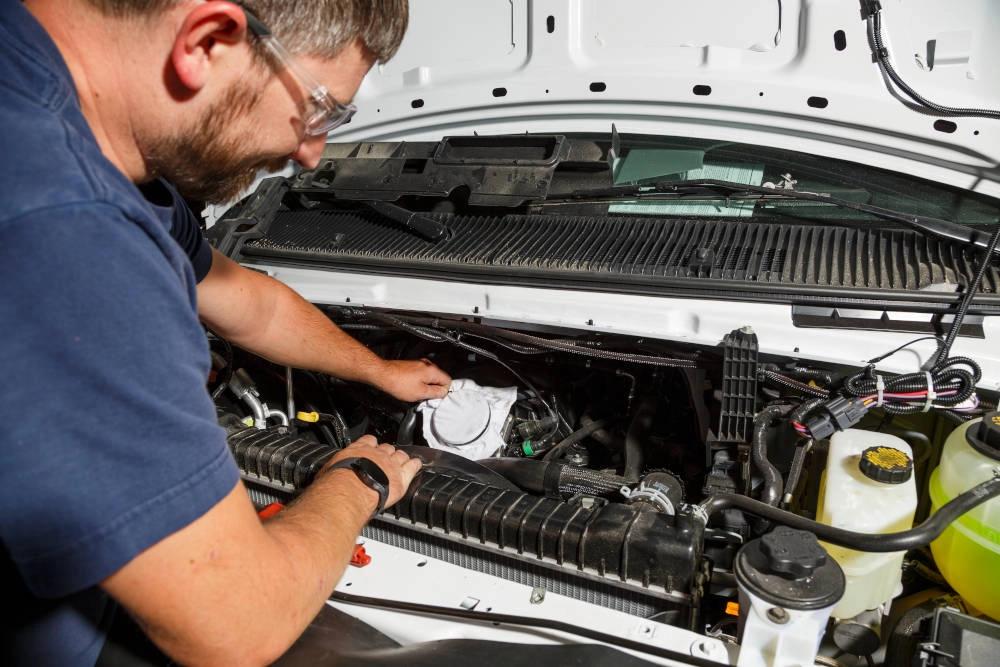
This section applies primarily to motorhomes and other motorized RVs. Towable travel trailers and fifth wheels do not have a propulsion engine or vehicle fuel system, although they may have separate generator maintenance requirements.
For a motorhome, check the chassis manufacturer's long-term storage recommendations before changing fluids or adding fuel treatments. Gasoline and diesel systems have different requirements. Some manufacturers recommend storing with a full fuel tank to reduce condensation, while fuel stabilizer recommendations depend on the engine, fuel type, and expected storage duration.
Inspect the engine oil, coolant protection rating, belts, hoses, and visible connections. If the oil is due for service, check whether the manufacturer recommends changing it before extended storage. Confirm that the engine coolant provides suitable protection for the expected minimum temperature. Never assume the coolant is winter-ready just because it was suitable during summer operation.
Do not run the engine in an enclosed storage area
Engine exhaust contains carbon monoxide, which can be fatal. Never run an engine or generator near an RV window, door, vent, air intake, or beneath the vehicle. Do not start the engine simply to let it idle periodically during storage.
Fuel-system repairs, engine servicing, and generator maintenance beyond routine owner checks should be handled by a qualified technician. Follow the chassis and generator manuals rather than applying generic seasonal procedures to every motorhome.
Protect the RV Interior From Freezing Temperatures
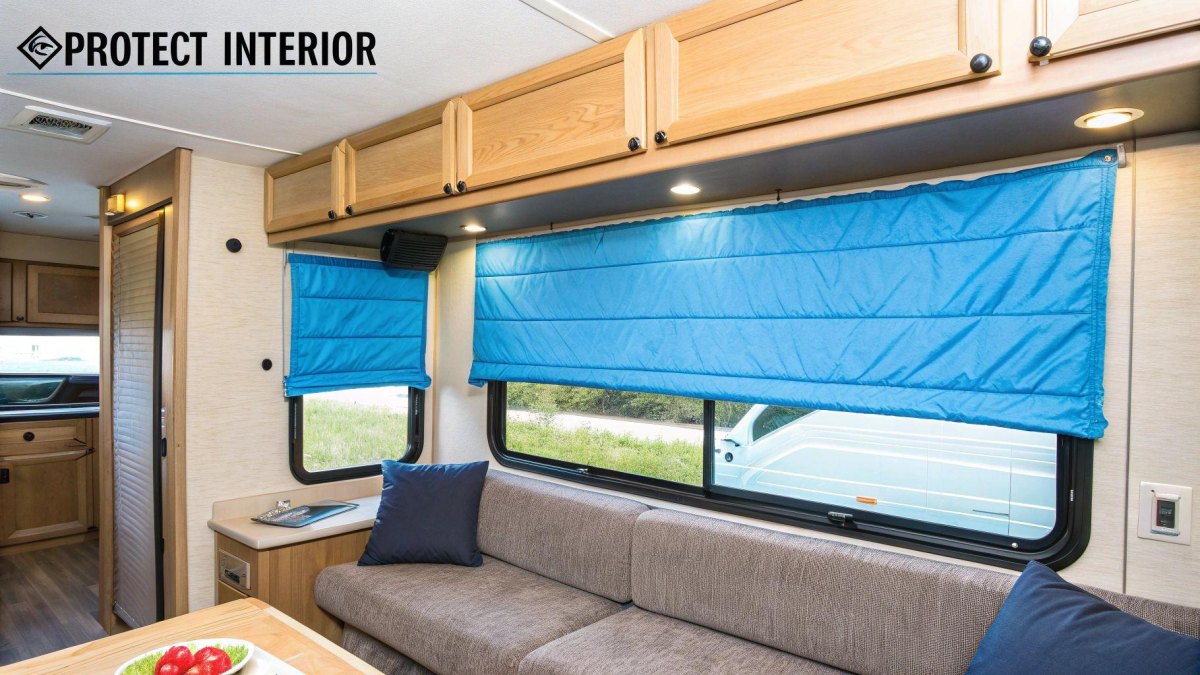
Even after the plumbing has been winterized, the interior needs attention. Furniture, flooring, cabinets, electronics, and other materials can be affected by prolonged temperature changes and condensation. Remove items that could freeze, leak, or deteriorate, including bottled liquids, cleaning products, and certain personal-care products.
Leave interior cabinet doors and drawers open where practical to encourage airflow. Stand cushions upright and remove mattresses or bedding if the storage environment is damp. Close curtains or blinds to reduce direct sunlight exposure to upholstery, while checking that window coverings do not interfere with ventilation requirements.
If the RV has exposed plumbing sections that cannot be drained, consult the manufacturer about additional protection. Do not rely on ordinary insulation alone to prevent freezing. Insulation slows heat loss but does not generate heat.
If you plan to maintain interior heat during storage, use only a properly installed, manufacturer-approved heating system with suitable power and safety provisions. Never use a cooktop, oven, or unvented portable heater for cabin heating. A heating system also does not eliminate the need to winterize vulnerable plumbing.
Turn Off Appliances and Disconnect Unnecessary Power
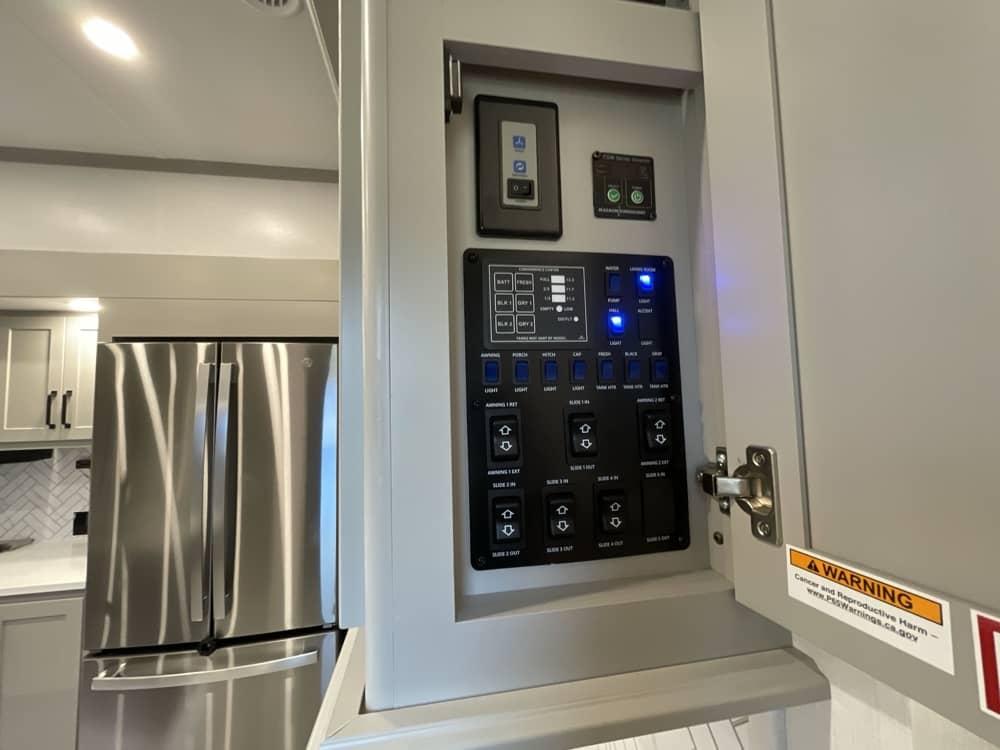
Before leaving the RV in storage, make a complete list of electrical appliances and systems that will remain energized. Refrigerators, televisions, entertainment equipment, water heaters, inverters, and other devices may draw power even when they appear to be switched off.
Remove food from the refrigerator and freezer, clean the compartments, and dry them thoroughly. Leave refrigerator doors open using the manufacturer's approved storage latch or arrangement to prevent odors and moisture buildup. Ice makers and refrigerator water connections need their own winterization procedures where fitted.
Switch off appliances and isolate unnecessary electrical circuits according to the RV owner's manual. Disconnect shore power if it is not required for an approved battery-maintenance or monitoring system. If you are leaving a charger connected, verify that it is compatible with the battery chemistry and designed for extended maintenance charging. Do not disconnect essential battery-management equipment without checking the manufacturer's instructions.
Also check propane appliance shutdown instructions and the location of the appropriate shutoff valves. If the RV has a propane system, never attempt improvised repairs or modifications. Have leaks, regulator issues, and appliance faults assessed by a qualified RV technician. Test smoke, carbon monoxide, and propane detectors according to their instructions, and check their expiration dates before the next trip.
Lubricate Hinges, Locks, and Moving Components
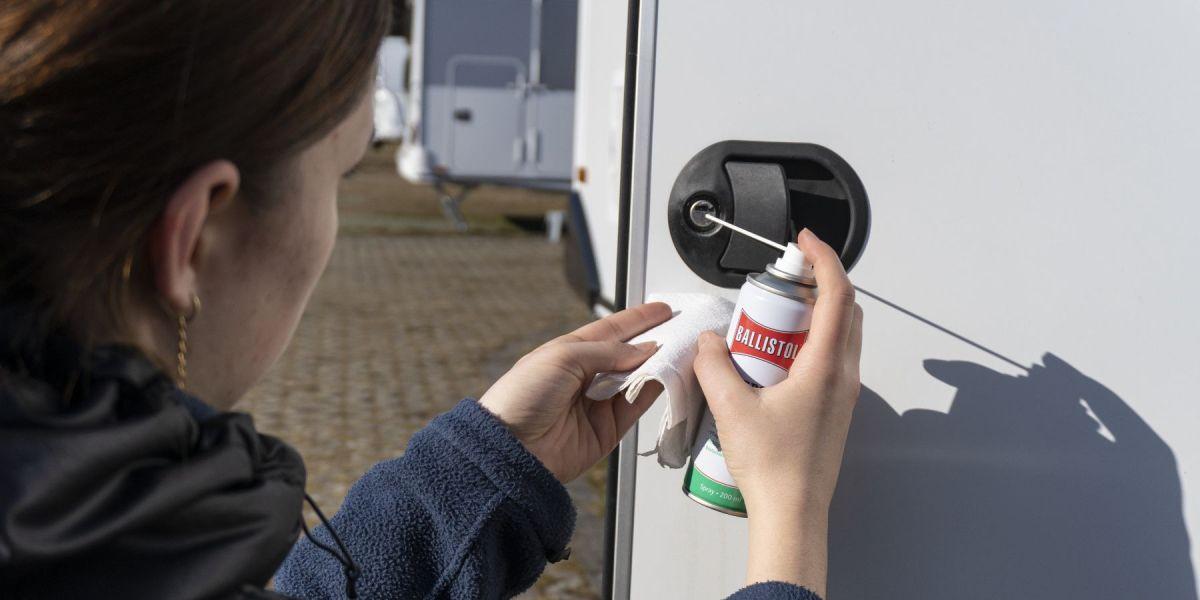
Small mechanical components are easy to overlook during winter preparation, but moisture and long periods without movement can leave hinges stiff, locks difficult to operate, and rubber seals dry or damaged. A little preventive maintenance can save time when the RV comes out of storage.
Inspect entry-door hinges, exterior storage compartment latches, access-panel locks, and other exposed moving parts. Clean away dirt and corrosion before applying a lubricant recommended for the component. Use a suitable lock-cylinder lubricant rather than assuming that every general-purpose spray is appropriate.
Check slide-out seals, awning joints, and other moving mechanisms if your RV has them. Different slide systems require different lubrication products and application points. Follow the slide mechanism manufacturer's instructions, since excessive or incorrect lubrication can attract dirt or damage components.
Inspect rubber door and window seals for cracking or stiffness, and use a compatible rubber conditioner if recommended. Wipe away excess lubricant and avoid getting products onto brake components, tires, or electrical connections. If a slide-out, awning, or powered leveling system has a mechanical fault, arrange professional service instead of forcing it to operate.
Check on Your RV Regularly Throughout Winter
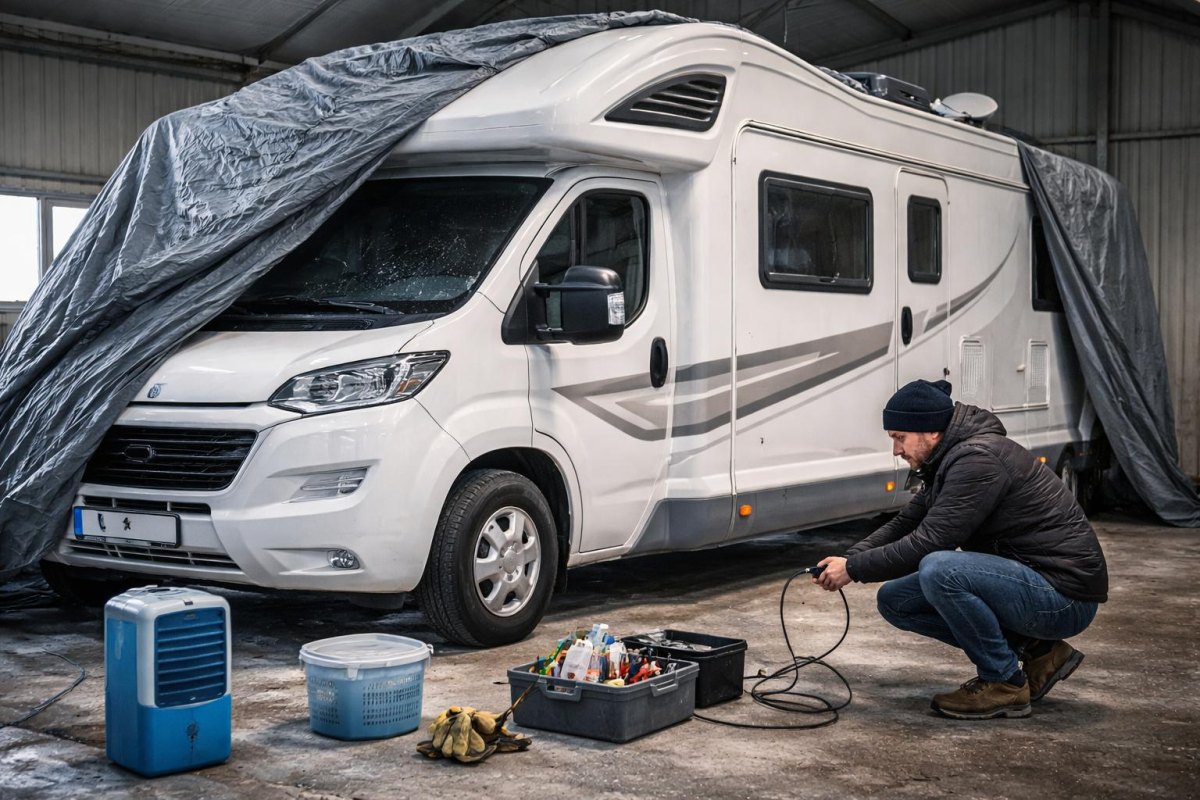
Winter storage should not mean forgetting about the RV until spring. Weather, temperature changes, battery discharge, and unexpected water intrusion can create problems even when the initial preparation was done correctly.
For an RV stored outdoors, I recommend arranging a monthly inspection as a practical starting point, with additional checks after major storms, heavy snowfall, or severe temperature changes. Some manufacturer guidance specifically recommends monthly interior inspections during extended storage. Regular inspections catch problems early, before they become expensive repairs.
- Look for roof leaks and water accumulation.
- Check the RV cover for tears, movement, and abrasion.
- Inspect tires and look for changes in inflation.
- Check battery charge and charger status.
- Look for condensation on windows and mirrors.
- Inspect the floor and cabinets for dampness or odors.
- Look for rodent droppings, nests, or damaged wiring.
- Check for snow accumulation that could exceed roof limits.
If heavy snow is expected, follow the RV manufacturer's instructions for snow removal and roof loading. Do not climb onto an icy roof or use tools that could puncture the membrane. If you cannot safely access the storage location, arrange for the storage facility or an RV service professional to perform the necessary checks.
Create a Spring De-Winterization Checklist
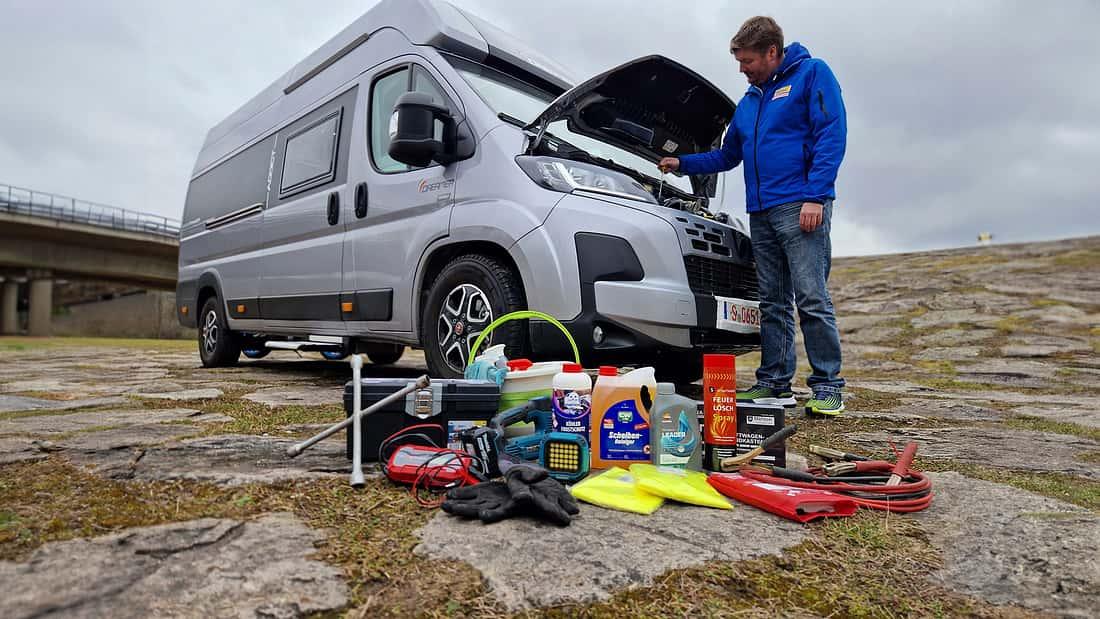
Winter preparation is only half the job. Before using the RV again, reverse the winterization process carefully and inspect the systems that have been sitting unused. Starting the camping season without checking plumbing, batteries, tires, and appliances can turn a simple first trip into an inconvenient repair stop.
Begin by removing the exterior cover carefully and inspecting the roof, windows, seals, tires, and underbody. Look for signs of leaks, pests, or weather damage before reconnecting utilities. Then work through the water system and electrical equipment using the manufacturer's recommissioning instructions.
- Inspect. Check the exterior, roof, tires, underbody, and storage compartments.
- Restore. Reconnect and charge batteries according to their chemistry and manufacturer instructions.
- Flush. Remove RV antifreeze from the freshwater system using the approved procedure.
- Sanitize. Clean and sanitize the freshwater tank and plumbing system before drinking-water use.
- Test. Check faucets, toilets, water heater, pumps, and visible connections for leaks.
- Service. Check engine fluids, generator requirements, tires, and chassis maintenance where applicable.
- Verify. Test safety detectors, appliances, lights, and other essential equipment.
Pay particular attention to water filters, ice makers, washing machines, and tankless water heaters. These components may need separate recommissioning procedures. Flush the system thoroughly and use the manufacturer's recommended sanitizing solution and contact time. Never assume that running a faucet briefly is sufficient to make the entire freshwater system safe.
My spring storage recommendation
Keep a written record of the winterization steps you completed, the products used, and any maintenance still outstanding. That record makes the next seasonal changeover more predictable and helps prevent missed components.
Before the first drive, verify cold tire pressures against the correct loaded-vehicle specifications, check exterior lights, and confirm that all access panels and compartments are secured. For motorhomes, arrange professional inspection of any unresolved chassis, braking, or mechanical concerns. A few deliberate checks now are considerably easier than discovering a problem halfway to the first campground.
More Pinterest Visuals



 RV Pet Travel11 RV Cat Tree Ideas That Make Small Spaces More Cat-Friendly
 Camping Gear & Planning15 RV Must-Haves for Beginners to Camp Safely and Comfortably
 Camping Recipes18 Easy RV Camping Snacks Ideas for Road Trips and Campfire Nights
 RV Pet Travel14 Practical RV Cat Travel Tips for a Safe and Comfortable Road Trip